March 19, 2012

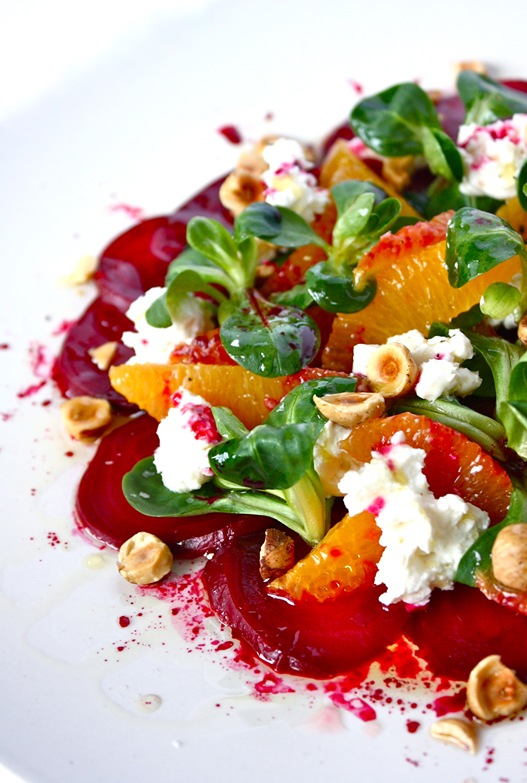
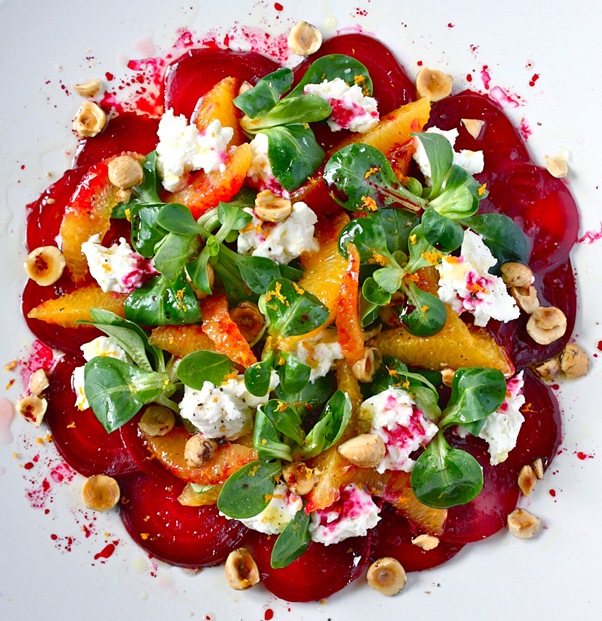
My new favourite salad: beetroot, orange, hazelnuts & goat cheese

IMG_1583

It’s been 2 months since I last posted…Reconsidering whether to maintain this blog and if so, how to do it?! I wanted to write both in english and spanish, but already had little time to do so in one language so I was clueless as to how to do it in two.  So, after this break and many other new projects happening at once, this is a try to reach a realistic approach to continue posting!

Post have been piling up, as I haven’t stopped cooking and testing recipes, but one of them is this simple salad inspired by a new book by Béatrice Peltre, La Tartine Gourmande: Recipes for inspired life. Béa’s book is a treasure to the eyes, beautiful photography for delicious, honest recipes with simple yet incredibly tasty ingredients. I’ve been a fan of her blog for a while now, precisely for her visual creativity, she has  a way to make everything her camera captures utterly beautiful! Her brightly coloured, lively photographs are so captivating, that you wish you could go along with her to the market to pick up those unreal ingredients and cook together…or rather watch her cook those vibrant looking dishes! So, when I received my copy of the book, I knew I wouldn’t be disappointed!!Scrumptious food & images!

IMG_1605

In her book, there’s an incredible beetroot millefeuille salad, you can see a photo on her own blog (along with the video presentation of the book) here. It’s so appealing, that although wasn’t a big beetroot fan, I decided to make peace with them, having a go at it. Surprisingly, I’ve undergone a transformation…I have turned into a beetroot junkie!! For 2 weeks I’ve been playing around with those beetroot dishes that appealed to me for the looks but I set aside fed up with those cooked beets sold ubiquitously! But now, beets are my friends and a source of inspiration! Salads, risottos, fresh pasta, soups!They’ve surpassed my expectations, with their bright vibrant, fucshia or red colour (I cannot find here the yellow or stripped varieties) and earthy comforting flavour.

So, this salad feels like a farewell to winter and welcome to spring! The sweet earthy beetroot combines perfectly with the juicy, slightly soury orange, with it’s grated rind( though do try lemon rind, which goes really well too). The creamy mix of soft goat cheese with ricotta mellows the intense flavour and gives a fresher finish; and the crunchy hazelnuts and their oil give a luxurious nutty feel. The greens, lamb’s lettuce is very neutral, so it’s just there to lighten it up and give it colour. Anyway, I can’t find a better way to express how good all ingredients go together and how tasty this salad is!  So…just give it a try to see for yourself! Plus, if you get fresh beets (as they go bad really quickly), do use up their stalks and leaves..for a tart or on their own!

IMG_1576

Beetroot, orange, hazelnut & goat cheese salad

(for 1 large salad for 2)

2 large beetroots

40g soft goat cheese

40g ricotta (here’s a simple way to make your own!)

a handful of lamb’s lettuce

1/2 a sanguine orange

1/2 an orange*

grated rind of half an orange (or lemon)

maldon salt

20g of toasted hazelnuts (more or less to taste)

3 tbsp of hazelnut or walnut oil**

Freshly milled black pepper


*Or just use a whole orange, instead of half of each.

**I use this brand: Percheron Frères, but I cannot find a page with their cold-pressed oils!

Boil or bake the washed beetroots (I prefer the flavour when baked best). Either way, just make sure you cut about 2cm above where the stalks begin, or the beet will bleed it’s juices into the water or foil paper.

Boiling takes less time, just place the beet in a pot of salted water, bring to a boil and boil until fork tender.

For baking, place each beet onto a piece of aluminum paper large enough to wrap it around, drizzle a bit of olive oil and a sprinkle of salt. Bake at around 190ºC for 40’ to an hour, depending on the size. Since it’s fairly long, if you use this method, it’s worth it to roast some other veg at the same time for another dish!

When not too hot to handle but still warm (as they peel better), peel them, slice fairly thin and reserve.

Mix in a small bowl with a fork the goat cheese with the ricotta, set aside.

Cut the oranges on both top and bottom to expose the flesh. Place it on one end and peel running the paring knife along the shape of the orange to remove skin and white bits. Then cut in between the skin between segments to get the supremes. If you cannot be bothered to do this, just slice the orange! But getting the supremes, leaves you with still some flesh to press out enough juice for the dressing.

To arrange the salad, simply place the beet slices in a circular pattern in the dish, as if it were a capaccio. Then top, here and there with the cheese, the orange segments, lamb’s lettuce leaves and slightly broken or chopped hazelnuts.

Grate some orange/lemon peel on top, sprinkle some maldon or other fleur du sel, some freshly milled pepper and drizzle with the orange juice and nut oil.

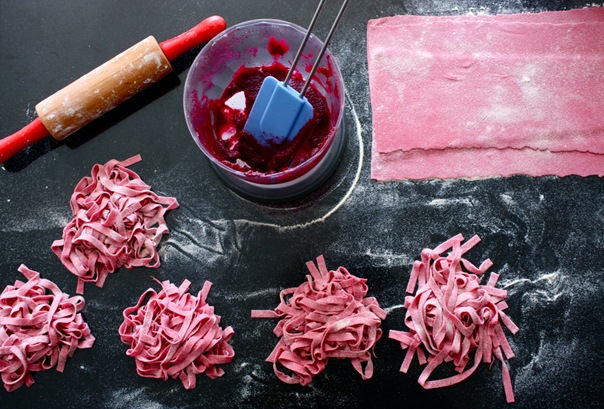
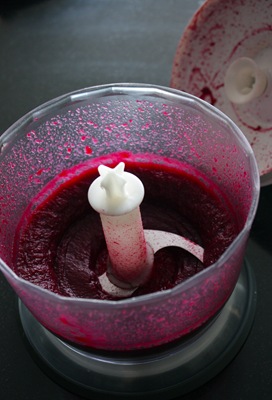
If you have leftover beetroot, use it up within 5 days, as it goes bad fairly quickly. If you like to make fresh pasta, it’s great to puree it and substitute it for at least half of the egg in the recipe. The final colour will obviously depend on the colour of the beets, the vivid fucsia ones are best for this for a strong dark colour…otherwise the less intense ones you will get this chewing gum colour :) which I’m sure kids would love, though!

IMG_1673

Ensalada de remolacha, naranja, avellanas y queso de cabra

(Para una ensalada generosa para 2 personas)

2 remolachas grandes

40g queso de cabra en rulo, suave

40g ricotta/requesón (aquí una manera fácil de hacerlo en casa!)

un manojo de canónigos

1/2 naranja sanguina

1/2 naranja

la ralladura de media naranja (o limón)

sal tipo maldon (flor de sal)

20g de avellanas tostadas(más o menos, al gusto)

3 cucharadas de aceite de avellanas o nueces

Pimienta negra recién molida


*Podeis usar una naranja y olvidaros de la sanguina.

**Yo uso esta marca: Percheron Frères, que distribuye Antonio de Miguel (muydemiguel para particulares).

Lo principal es cocer o asar las berenjenas. A mi particularmente, me gustan más asadas, quedan con un sabor más intenso, más dulce, pero tardan más, así que os decidís por encender el horno, compensa asar alguna otra verdura para amortizar el gasto!

De cualquier modo, se han de lavar, para retirar la tierra y cortar por encima del comienzo del tallo, porque sino sangran al cocer o asar y pierden jugos. Para cocer, como las patatas, cubrir de agua con algo de sal en un cazo, llevar a ebullición y pinchar a los 20 minutos para ver si estan tiernas.

Si se asan, se cortan 2 trozos de albal suficientemente grandes para envolver cada una, se colocan encima, se echa un chorrito de aceite y sal y se cierran los paquetes. Se meten en un horno precalentado a 190ºC durante unos 40 minutos a 1 hora (dependerá del tamaño de las remolachas)

Se pelan mejor aún calientes, sin abrasarse los dedos, claro. Se cortan en rodajas final y se reservan.

Entre tanto preparamos la mezcla de quesos, uniendo los dos aplastando con un tenedor hasta obtener una crema homogenea.

Preparamos las supremas de naranjas, dando dos cortes a la naranja en ambos extremos dejando expuesta la pulpa. Se apoya sobre la base y se corta la piel con una puntilla de arriba a abajo, siguiendo el contorno de la naranja retirando todo lo blanco. Así se entreverán los gajos limpios y solo queda cortar entre la piel de los segmentos. Lo que queda se presionará para extraer el jugo para el aliño. Así que no se desaprovecha nada!

Sólo queda montar la ensalada, colocando las rodajas de remolacha como base cubriendo el plato en circulos concéntricos, como un carpaccio. Luego distribuyendo cucharaditas de queso, los segmentos de naranja, los canónigos y avellanas ligeramente rotas al gusto por toda la superficie.

Se sazona con la sal maldon, la pimienta recién molida y rallando la piel de naranja o limón por toda la superficie y se aliña exprimiendo lo que queda de la naranja y con un chorrito del aceite de avellanas o nueces.

Si os gusta preparar pasta fresca en casa, normalmente 1 huevo por cada 100g de harina (o mezcla de harina y semola) se le puede dar color, sustituyendo al menos la mitad del huevo por puré de la remolacha cocida que os quede! Dependiendo del tipo de remolacha os quedará un color más intenso tipo fucsia oscuro o rosa chicle como me pasó a mí con la segunda tanda de remolachas más rojizas! Supongo que al gusto de niños…no tanto de mayores!:)

IMG_1660

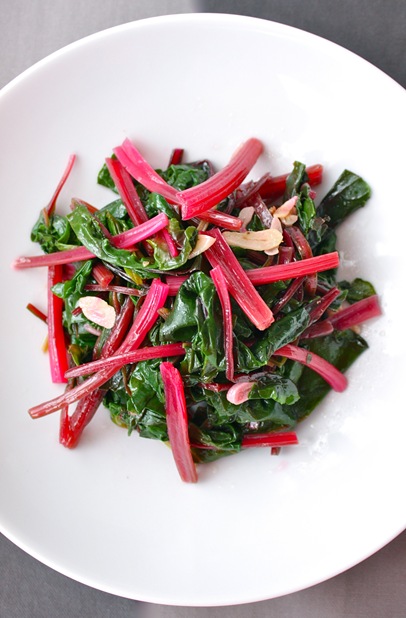
Y si conseguís remolachas frescas, con las pencas y hojas presentables, aprovechar para cocerlas como si fuesen acelgas, para aprovecharlas solas salteadas o para alguna quiche o tortilla. Quedan con un color rosa radioctivo precioso! Y vistas así, las “acelgas” entran mejor! Qué aproveche!

continue for recipe...

January 16, 2012

Tarte bourdaloue: classique & a choco-framboise test version

IMG_1357
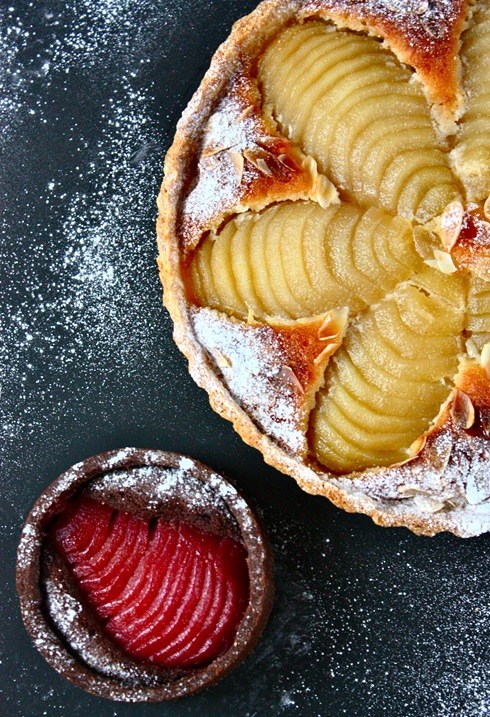
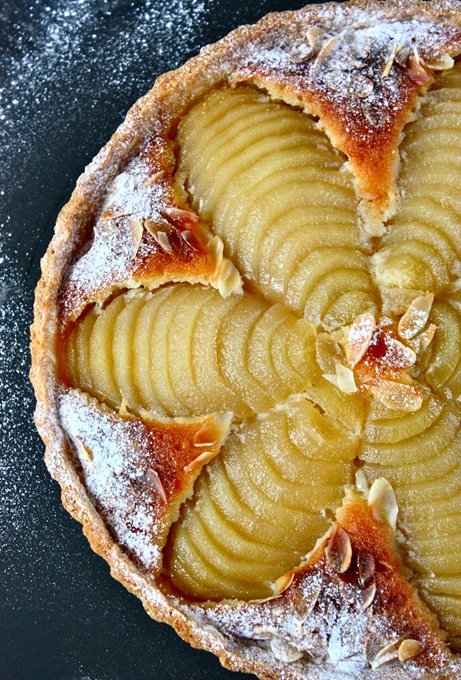
Tarte bourdaloue, created by the french pâtissier Coquelin in la Pâtisserie Bourdaloue, which he bought in 1909 (still open in Paris in the street after which it was named)  is probably  one of the most beautiful tarts of all times! The moment I saw it, I fell in love with it and wanted to give it a try!To my surprise, it is not just about the looks, this tart is delicious too! A buttery toasted “pâte sucrée” (although some recipes suggest just pâte brisée, unsweetened pastry, I prefer the sweeter version) with a moist cooked almond cream center blended in between vanilla poached pears. Definately a must try, if you haven’t yet tasted this delicacy!
After a few tries, I have found that the texture and amount of the frangipane (almond cream) is one of the key point to get a nice star shape design. Also, a blind baking of the tart base, to ensure it is toasted to perfection after the filling is added! So, beware of recipes that do not precook the pastry, since as far as I’ve tried it doesn’t come out just right!IMG_1393
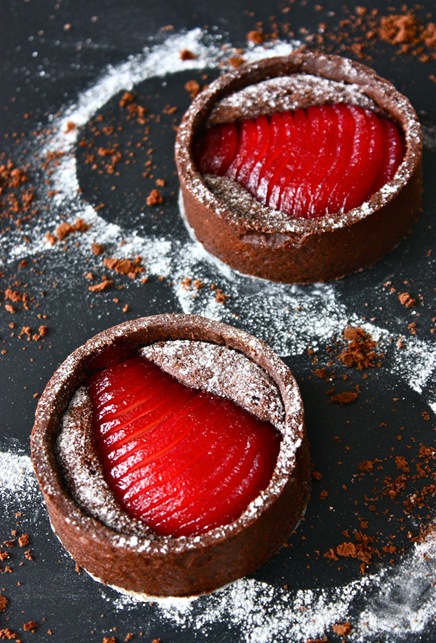
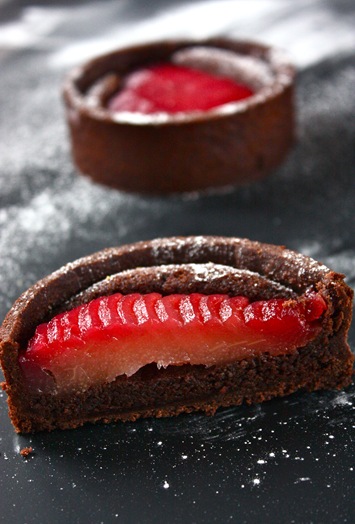
Anyway, here I introduce you a variation: raspberry chocolate version. I read on chef Eddy Van Damme’s excellent pastry blog a cassis poached pear version of this tart, though with the plain tart base and almond cream. I still had some frozen raspberries, so I wanted to try if the pears would take up their flavour…which I thought would match beautifully with chocolate! So, this version uses a chocolate pastry base and a cocoa almond cream. I was impressed with the results! The raspberry syrup poached pears not only do they look amazing, but they taste like raspberries! Next time I’ll make a full tart version!
IMG_1319
Hope you let me know if you try them!

Tarte bourdaloue
(for a 22cm in diameter round mould)
For the poached pears:
3 pears (here in Spain: conference or “Blanquilla” are good)
800g of water
400g of sugar
juice of half a lemon
rind of half a lemon
1/2 vanilla bean, seeds scraped out
For the pâte sucrée:
150g flour
75g butter
30g sugar
pinch of salt
about 30g iced water (I never measure it)
For the frangipane/almond cream:
75g icing sugar
75g butter, room temperature
80g almond powder
1 large egg, room temperature
10g flour
10ml of brandy
1/4 vanilla bean, seeds scraped out
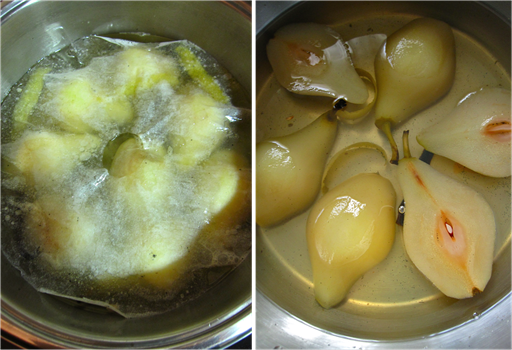
If possible poach the pears one day ahead, to allow them to cool down and work with them more comfortably. Also, if possible prefer riper pears (not overipe) over green ones, as they poach in less time and take up the flavours better.
Simply boil the water, the aromatics and the sugar to dissolve, peel and cut the pears in half and add to the boiling liquid. Poach until fork tender, 30-40 minutes, depending mainly on how ripe they were. Leave to cool in the poaching syrup.
vanilla poached pears
Prepare the pâte sucrée, I am always inclined to use the “sablage” method rather than the “creaming” method, but you can do either to your preference. For the sablage, in a bowl mix the flour with the butter cut up in small dices and mix in completely until it resembles breadcrumbs (you can put it all together in a food processor to make life easier…or quicker!)
Then, add the sugar and pinch of salt and add the iced water little by little to get a rough dough that barely comes together. Dump all into a work surface and without kneading bring the dough together. There’s a technique called “fraisage”, which is a means of mixing the dough to make it homogeneous without developing the gluten in the flour. This is done by smearing it on a working surface, a small piece at a time, using the heel of your palm. This surrounds the butter around the flour and ensures that you don't overwork the dough, keeping the resulting dough tender and not elastic. I found this video of pastry chef Joanne Chang a fairly good explanation of how it’s done, though she does it for a flaky pastry in order to layer the butter (watch starting minute 3:17, before it’s a bit of her pastry shop/cafeteria advertising :) ). If still in doubt, check this video (in french) out (minute 1:10).
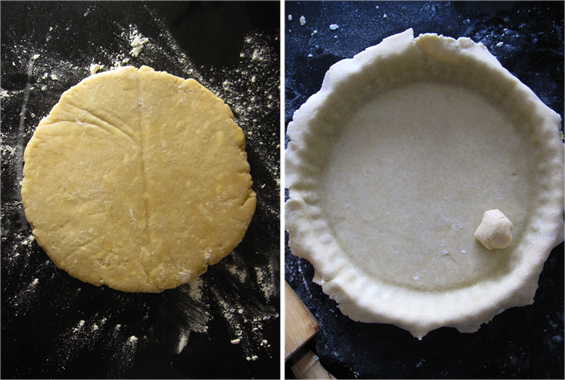
Once it all comes together, shape into a flattened disc, so it cools sooner and it is easier to stretch later. Rest wrapped in film or a ziplock bag in the fridge for at least 30 minutes (if longer, better, you could do this the day before, as well).
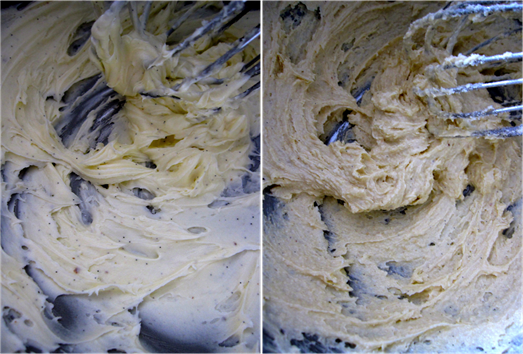
As for the almond cream, beat the room temperature butter with the powdered sugar, a pinch of salt and the vanilla seeds. Add the beaten, room temperature eggs slowly or it will split! (adding cold liquids to a solid fat, such as butter, is not a good idea! )Then, add the bit of liqueur and the powdered almond. Last, add the sifted flour. If you have one, place into a pastry bag, as it’s better to distribute it over the pastry.
frangipane vanille
Time to put it all together, like I said, some people stretch the dough to line the mould, add the almond cream, the pears and off it goes into the oven, but if you can take the extra minutes to blind bake the dough, the result will be significantly better.
So, stretch the dough to about 3mm thickness and line the greased tart mould. With a bit of the extra dough that overhangs the sides, press into the sides of the base well. Prick the base and rest it in the fridge for about 30 minutes or longer (this extra rest is to ensure it won’t shrink as it bakes after stretching).
etaler la pâte
Cut off the overhanging dough with a knife or rolling a rolling pin (and in that case, press in a bit to lift up the thickened top and prick holes around the whole base
Cover the tart with a large enough piece of parchment wrinkled up and top with ceramic pie weights or some legume (chickpeas or larger beans work well!).
Place in a 175ºC preheated oven for 15-20 minutes, until the sides begin to colour. Remove, turn the oven up to 180ºC and lift up the paper with the beans and leave to cool for a few minutes so you don’t get burned as you work on it piping the cream, which would also quickly melt in.
Pipe the almond cream, if you are using a piping bag in a circular motion, starting from the center, spreading out. If you don’t have a piping bag, simple smear a 1 cm layer of cream through the base as consistently in thickness as possible.
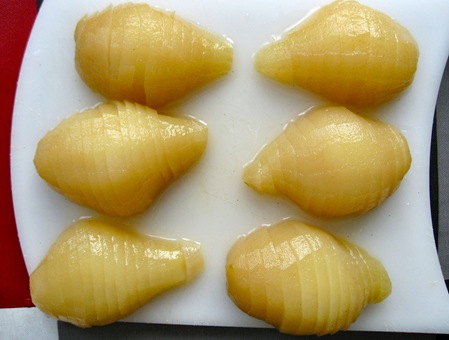
Strain the pears, and remove the tips and hard bits surrounding the seeds and cut along it’s width in fine slices.
IMG_6890
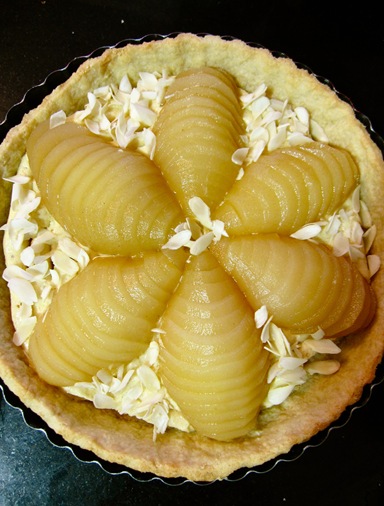
Arrange over the almond cream in a star pattern (if you make a larger tart, simply arrange more pear halves). I like to add some sliced almonds around too, but that’s optional.
IMG_6894
Place back into the oven for 30-40 minutes (if will depend on how thick your frangipane layer is and on your oven too).
And there it is, the beautiful tarte bourdaloue, simple sprinkle some icing sugar around the sides or over the frangipane. Some people like to give it shine with some gelatin base or with lightly warmed apricot jam, adding a bit of water. But I prefer it this way.
IMG_1385
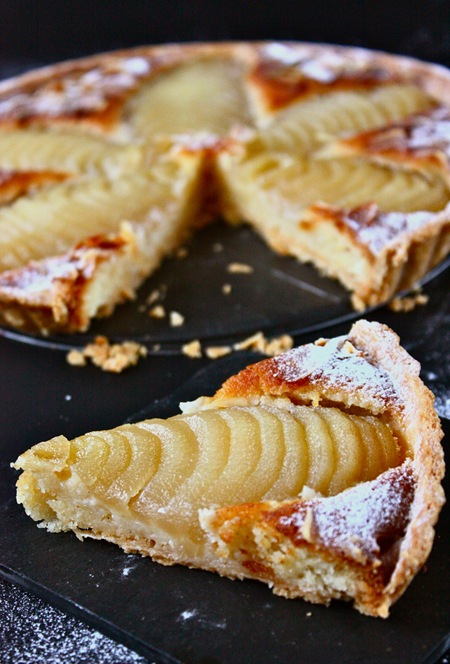
Here’s the cut:
IMG_1405
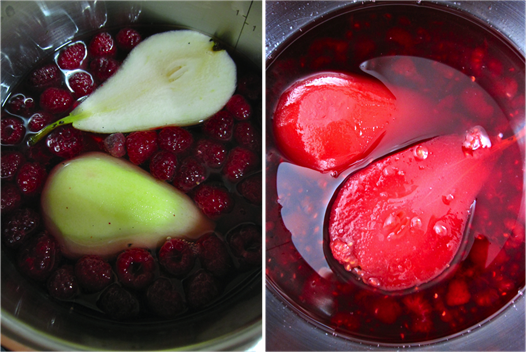
As for the choco raspberry version, simply add some raspberries to the poaching syrup (I added about 75g to 250g of water) and cook together. Leave to cool in that liquid overnight so the colour intensifies…and so does the flavour!
raspberry poached pears bis
Remove hard bits and cut.

Prepare a chocolate sugar dough, just substituting some of the flour for cocoa (about 20g or more to taste) and do the same for the almond cream, I just added cocoa to taste, instead of the flour.
IMG_6823
Put together the same way, by blind baking the dough, piping the cream and placing the pear on top. I dind’t have pastry rings, so I used a plating one…much, much higher (horrible to work with!) of 9cm in diameter.
tarte bourdalou choco framboise
Bake for 20-30 minutes and ready to enjoy!
IMG_1342
And here’s the cut from the choco raspberry version:
IMG_1396
Choose one, but I suggest you do try them, you won’t regret it!!It’s worth the work!
continue for recipe...

January 7, 2012

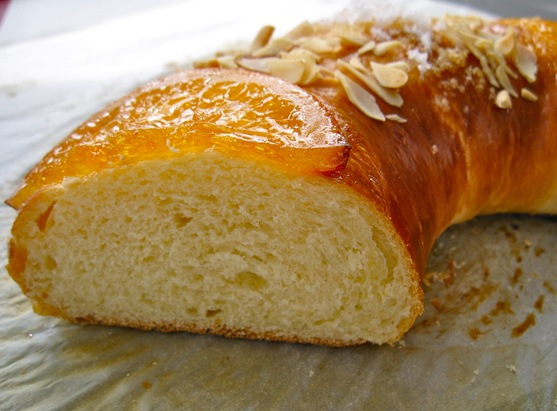
The day after…still eating Roscón de Reyes

IMG_3007b
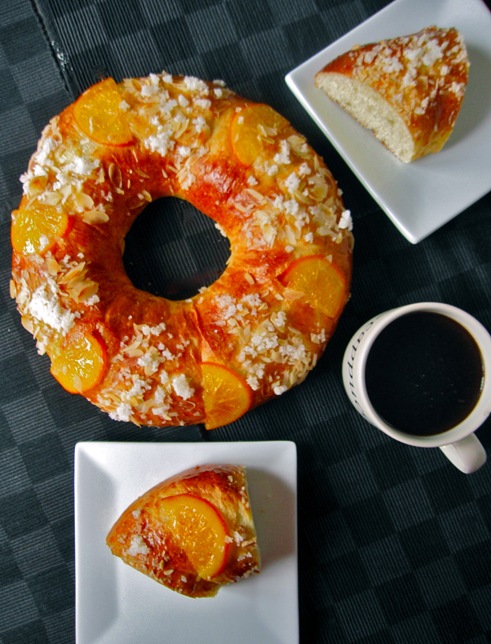
First of all, happy “late” New Year! I hope this year brings you all what you desire, but above all health to enjoy it with your loved ones! I’ve been meaning to write, but somehow I’ve just managed to accumulate photos for posts that I haven’t had time to put together, but hope that will sometime see the light. This roscón was meant to come earlier, way before the “día de Reyes”, that is, yesterday! But, though I’ve been making roscón a few times for about a month or so, I’m glad I’ve been forced to delay publishing as the last trial was my best version yet, so very close to my “ideal” roscón. A little more orange blossom, a touch of glucose to keep it moister as long as it lasts! and less yeast for a slower and longer fermentation for that better keeping quality made this latter one very special indeed.
IMG_6800
Still, every time I make roscón at this time of the year, I wonder why I do not make it more often all year around, even if in a more practical individual bun version like “suizos” here in spain, or in the shape of Gregoire Michaud’s cuchaulles, which I’ve fallen in love with! Whichever shape, the tender and aromatic dough is a delicacy I don’t get tired of…I could have slice after slice of a whole 500g roscón! So, if you haven’t tried it yet, and you like the subtle aroma of orange blossom (when used with caution!) along with citrus rinds…give it a try for any time of the year! as a roscón shape to share with family or friends or in a more covenient bun shape to eat at home or take to work!
I know there are hundreds of great recipes out there, this is just my favourite recipe so far! If you get to try it, I hope you like it as much as we do!
IMG_1255

Roscón de Reyes
(enough for a 500g medium roscón..I’d make double, enough for 2!!)
For the preferment:

50g strong flour
30g water
0,5g dry yeast (or 1,5g of fresh)
For the dough:

200g of strong flour
5g of dry yeast (or 15g fresh)
1 L egg*
15g dark rhum
15g orange blossom water
35g milk
grated rind of half an orange
grated rind of half a lemon
50g granulated white sugar
pinch of salt
45g unsalted butter
For decoration:

1 beaten egg, for egg wash
5-6 confit orange half slices

15g of raw sliced almonds (I use whole ones I laminate)
20g granulated sugar
a few drops of lemon juice
*If you use a small egg, you may just need to add a bit more milk for the same texture or leave it for a more manageable, less hydrated, dough.
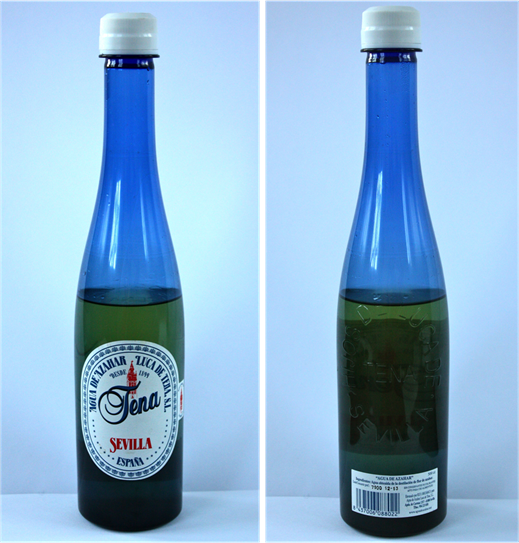
Before begining, just a note to say that though there are various orange blossom waters out there, those that are natural, not with flavouring are significantly better, a much more delicate aroma. Here in Spain, this is the one I have found to be best, so far:
agua de azahar
First of all, for the decoration, if you plan to make the orange slices yourself, you can confit half an orange, cut into very thin slices as explained here.
IMG_6752
When ready, just remove excess syrup and place on parchment paper until ready to use, or keep in the fridge in a sealed bag or tupper until that time.
For the preferment, mix the flour, the yeast and room temperature water and knead lightly into a homogeneous mass. If it feels dry, add a bit more water. Then, leave to rise covered for about 1 hour until almost doubled in size.
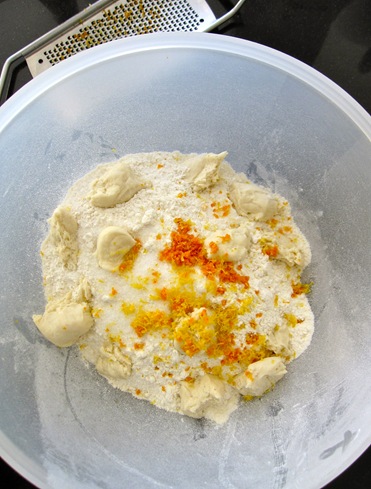
When risen, weigh the rest of the flour into a bowl and distribute the preferment cut up into smaller pieces along with the yeast, the sugar, the orange and lemon rind (or add them to the liquids if you prefer), the glucose and the pinch of salt.
IMG_6755
Then, add the wet ingredients, the egg and the mix or rhum, milk and orange blossom water and mix to get a rough dough with no dry lumps of flour.
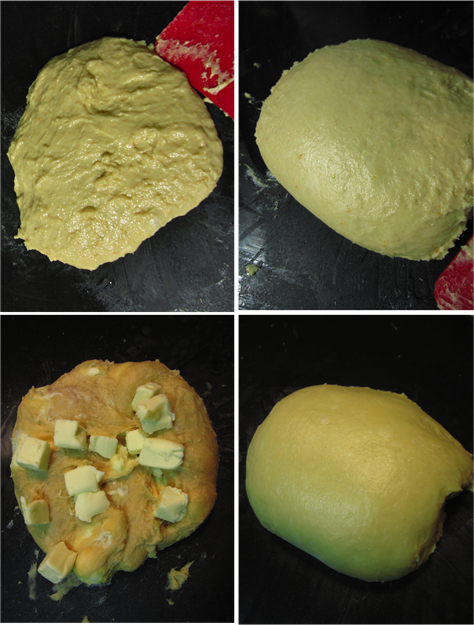
Rest for 5-10 minutes and begin kneading. It is a fairly wet dough, so take a look at this technique for kneading hydrated dought by Bertinet, or this other video. After some kneading it will come together into a smooth dough as the gluten develops.
When it does, begin to add the cool butter cut into small dices or chunks. It will look as if the dough separates completely as the butter begins to integrate but it will eventually come together leaving a silky smooth barely sticky dough.
kneading roscón
Place in a lightly greased bowl (plastic works best as the dough sticks less to it than to glass or metal) cover and leave to rise until almost doubled. Mine took over 2 hours (I question the reliability of the dry yeast I bought last, also it is fairly cool in my kitchen, around 18ºC! so check after 1hour).
IMG_4244 
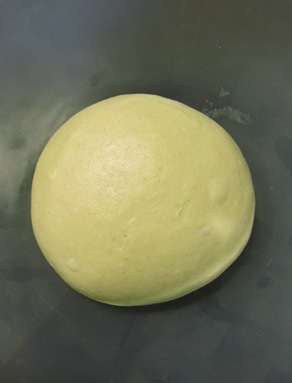
Press out all air, shape into a smooth ball again and rest for a few minutes, so the dough relaxes a bit before shaping.
Press into the center of the ball to make a hole, lift the dough and turn around to make the hole larger by the effect of gravity of by lightly stretching a little. You should make the hole large enough so that it doesn’t close up after fermentation.
There are two ways to do that, one is to stretch it out a lot, so that as it doubles it still stays fairly large, even if it may not be perfectly round. The other is to stretch it a bit more that a large metal presentation ring (about 15cm for this roscón size), place the greased ring (on the outer side) so that as the dough ferments and grows, it doesn’t stick. Still then, aim to make the initial hole fairly large or else as it still grows in the oven, it will end up too small (some people bake it with the metal ring, but I prefer not as the center stays very pale).
Press the skin around the entire roscón, as if sliding it underneath, to give it some tension and make the surface really smooth.
I like to brush it lightly with the egg wash before fermenting it, to give it a second layer after fermentation, which gives a shinier coating after baking
I left it to ferment for about 4 hours (again, at around 18ºC!) just watch that it does not overferment, by pressing lightly into it (if it sticks, wet your finger a bit) it should not leave an indentation, but very slowly come back to half way its original position.
Brush again with some egg wash and we’re ready to decorate.
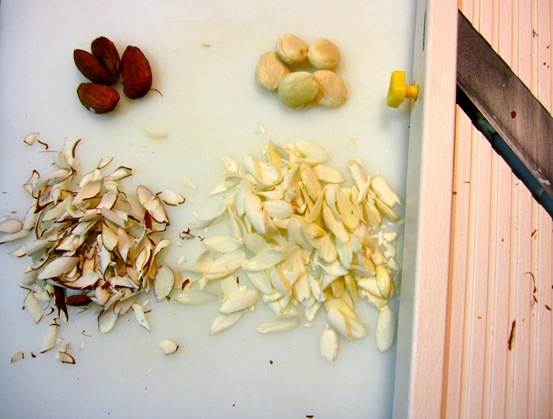
I like to laminate the almonds, either raw or peeled with a mandoline. But obviously it may be more practical to buy them laminated.
IMG_6769
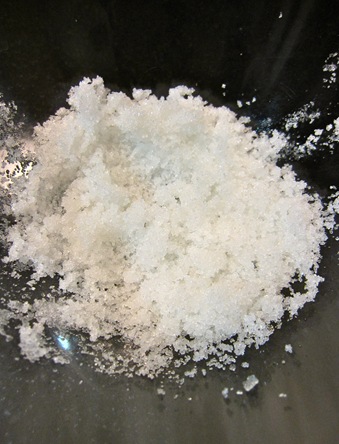
To prepare the sugar “escarchado” simply wet it VERY lightly with a few drops of lemon or water to give it some texture. You may add it before baking or after, if your oven tends to caramelise it, as it will stick anyway as it dries up.
IMG_6760
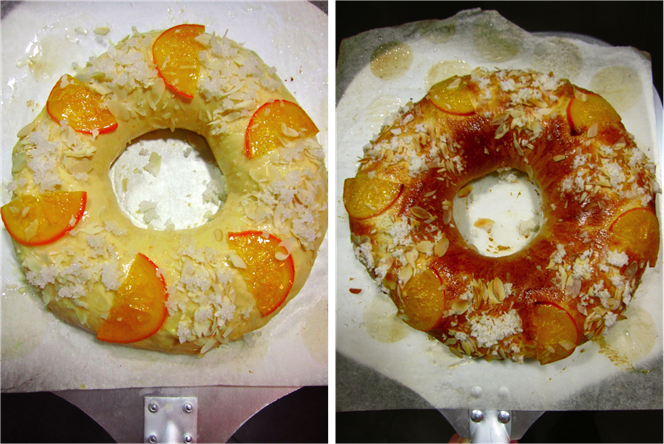
Decorate as you like and bake in a 180ºC (if fan assisted) or 200ºC (if not) preheated oven for about 15-20 minutes, until evenly golden brown.
baking roscón
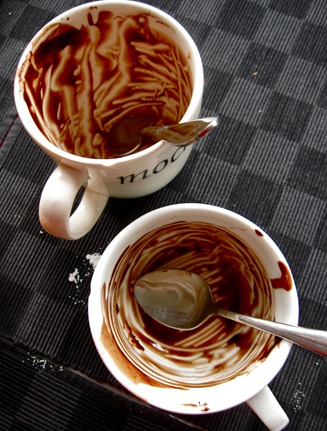
Place on a cooling rack, and enjoy when it has cooled down! It’s best with some how thick chocolate, my favourite recipe here (it was my first recipe too!)!
IMG_1283
Nothing like bought chocolate! up to the last drop!
IMG_3023
Here’s the cut!
IMG_6796
One of them has kept soft and moist for the two days it lasted! The other didn’t make it that far!
IMG_1263
continue for recipe...