February 28, 2011

Tasty rough puff pastry broccoli & bacon quiche


Not too long ago, I read a recipe by Dan Lepard of a quiche with a very flaky pastry. At first I thought it was the usual shortcrust pastry though laminated as if it were puff pastry. Looking into it I realised it was a rough (quick, we call it here) puff pastry but substituting some of the usual iced water in the recipe for other "liquids", namely milk and yolks. Funny that whenever I want puff pastry (which is not too often for the tedious work and time it takes) I make it from scratch. The proper, long way I mean, inserting the butter inside the dough,  with it's up to 6 simple turns (or less depending on the amount of butter for proper lamination)... But since school I haven't used rough puff pastry! (I didn't even remember doing it). So, I was curious, I was sure the so-called " rough puff" wouldn't rise properly to give the delicate crispy layers of the "real" thing. But, had to try it...


Since, I've played around for quite a few times after some research on books, old notes, etc. though it almost worked from the first try! I was sooo amazed the first time I watched reluctant how it cooked in the oven, when it a matter of minutes it puffed up as if it were a perfectly laminated proper puff pastry!! Honestly, the results are wonderful!!!In less than half the time (much less, actually) you get a puff pastry that tastes better than any store-bought one (assuming you use proper, decent quality butter). Butter is what makes it heavenly... Other than it's flavour, mainly because it melts at lower than body temperature, so you get a clean mouth feel, whereas nasty hydrogenated fats in the form of margarines (so overused here in all industrial viennoiserie) melt at higher temperatures, which makes them easier to work with but result in a waxy, sticky mouth-feel. So, considering this quick puff pastry uses 1: 1 parts flour: butter (the maximum you ever use for puff pastry itself) imagine how delicious it is!!!!! (ok, ok, I am aware of the calories or saturated fats, but you don't use that much per portion, plus, did you know trans-fats in hydrogenated oils actually ends up raising the amount of bad fatty acids in the blood?) So...I am totally for: use real butter! ;)

About the filling, I love broccoli and the small touch of bacon makes it super tasty! Believe me, we made this in class and even those not veggie-friendly absolutely loved it! For the quiche cream I often use fresh cream rather than milk for a creamier result (more like crème brulée rather than flan) but it can feel too dense sometimes. So, this time I've substituted some for sour cream with excellent results. The truth is that there's not much quiche cream in the quiche as it is packed with the broccoli itself which takes up most of the space, so the setting cream merely acts as a binder, but with the touch of sour cream, or it could all be crème fraîche, it gives a still creamy but lighter feel. I hope you enjoy the quiche, and specially that you learn to make this simple but awesome pastry for any other uses you like! I will attempt to guide you as best I can though the process of achieving that heavenly crispy & flaky rough puff pastry (thanks Dan for the inspiration!).


continue for recipe...

February 13, 2011

Intense white chocolate & maracuya truffles

IMG_3430
I’m not particularly fond of white chocolate, I find it too sweet for my taste with a dense almost sticky mouth-feel. So, I never used white chocolate for any desserts until I tried it matched with more sour flavours…The first time was at a restaurant where we’d make toasted almond and lemon rind tempered white chocolate petit fours. They still tasted fairly sweet, but the flavour of the lemon rind matched with the crunchy toasted almond was really nice. Later on, I began working with a fantastic swedish chef who introduced me to this match made in heaven: white chocolate and maracuya! He’d make this dense square truffles coated with green pistachio and though I never got the recipe, I always kept that delicious combination in mind!
I’m not much of a sweet tooth, so it’s only taken me over 3 years to try to re-create those truffles, though I wanted to make them enhancing the sourness of the maracuya to counteract on the overly sweet white chocolate. Also, I wanted to make these softer, more melt in your mouth…After a few tries at work, I got it just how I wanted it! This ganache is beautiffffuuuul!!!!(why did it take me 3 years?!) Everyone in class, we are 18, has loved them. It is fairly simple, though the only tricky part is that since white chocolate is so fussy and there’s almost 3 times more chocolate than “liquid”, when usually dark chocolate ganache for truffles is 1:1, you have to be careful on the order ingredients are added to each other to get a smooth emulsion rather than a seized mess! (which can be fixed, but the texture might suffer).
 IMG_34382
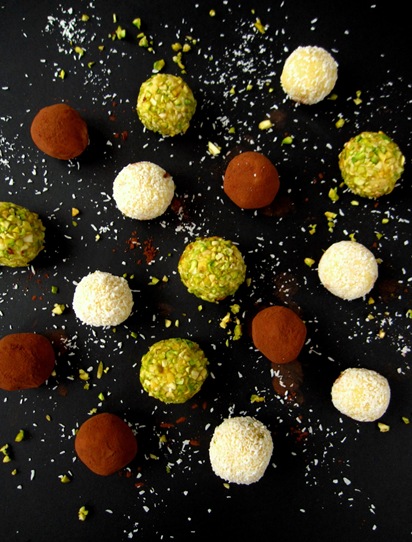
I wanted to coat these in a thin dark chocolate layer, but I was too lazy to temper such a small amount of chocolate so as coatings I’ve used chopped pistacchio (that’s how this chef served them) dried grated coconut (next time I’ll toast it to see how the flavour matches) and cocoa, which honestly I think it’s how I like it best, though it doesn’t look as appealing. But if you think of other coating you may like, go ahead. I wanted to try finely grated (through microplane or such) macadamia nuts, liophilised  raspberry mixed with some icing sugar, as it’s fairly sour, but had run out so…for the next time! I hope you like them (you will if you like maracuya!)…or adapt them to your favourite fruit puree: like raspberry or pineapple with lime rind, sanguine orange, apricot, lemon & verbena etc.
irfanview

White chocolate & maracuya truffles
(enough for about 40-50 truffles)

60g  maracuya juice
30g cream, 35% fat
10g sugar
325g of white chocolate
20g unsalted butter
+ whatever you are going to use to coat them: not toasted pistachio, grated coconut, cocoa powder…
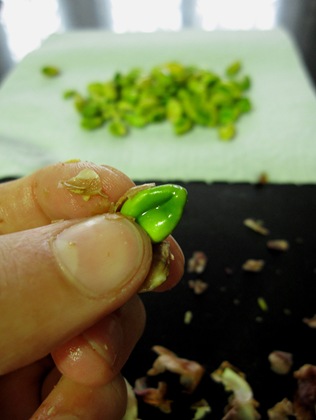
If you are going to use pistachios, but they aren’t double-peeled, which is what happened to me, cover them with boiling water to blanch them and let them soak about 10 minutes or more to soften the skin and make peeling easier (or rather, make it possible!)
IMG_3404
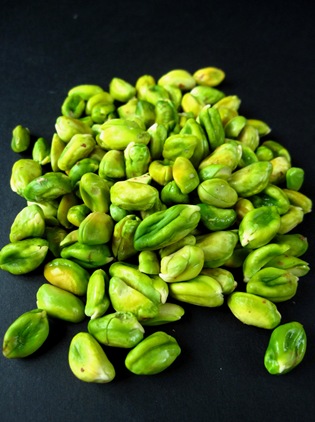
See how easy it comes out and how beautifully green they are inside! Do not buy toasted ones, as they’ve lost the colour!
IMG_3406
And here they are…
IMG_3407
I prefer to let them dry a bit, either overnight spread out in a tray or in a very low oven to remove excess humidity to then chop them up.
For the ganache, although the amount of time from the moment it’s prepared to when the truffles are shaped can be shortened to under one hour by forcing it to cool faster. I recommend that you plan ahead and prepared them the day before, so that they set slowly over at least 12 hours. As Harold McGee notes, this is done so that the cocoa fat forms more stable crystals rather so that they melt slower in the mouth and don’t have a greasy feel.
I’ve tried many ways to do this part…boiling the liquid ingredients and placing over the chopped chocolate, melting the chocolate on it’s own and adding the liquid ingredients after dissolving the sugar, the other way around and I find, the following is the easiest & cleanest…
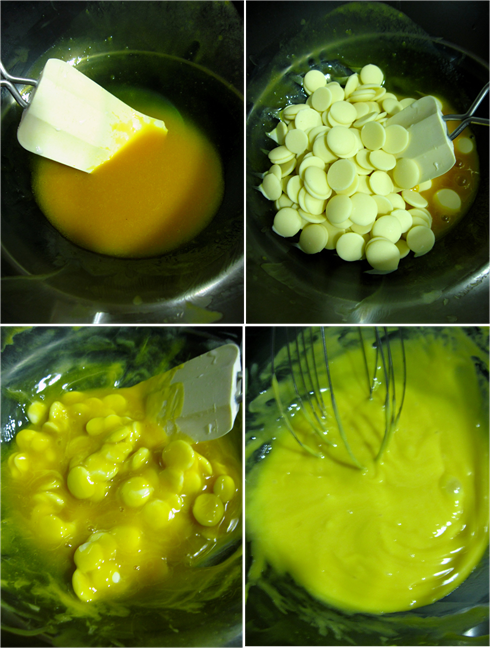
Put together in a bowl over a bain marie the reduced juice, the cream and the sugar and heat slowly until the sugar is completely dissolved.
Add the chocolate (if it is not in small chips, chop it up finely) and don’t stop swirling to incorporate it. You can do this with a spatula, but towards the end, it’s best to use a wire whisk to emulsify the chocolate well, to avoid it seizing and making sure it’s really smooth.
Imagen2
Remove from the heat and add the butter, also in small pieces, whisking it in to make an emulsion.
Another way that gives good results is to melt the chocolate slowly over a pan of boiling water or in the microwave (though this method needs a bit more looking after to avoid overheating & thus burning the delicate chocolate). Then, whisk in the liquids (best warmed up) with the sugar dissolved in them and last add the chopped up butter whisking further to emulsify.
When it’s smooth, pour onto a swallow dish or bowl and cover with cling film directly in contact with the ganache, so no skin forms.
Leave to cool & set at room temperature overnight or until completely set. Then, you can refrigerate it until ready to shape the truffles.
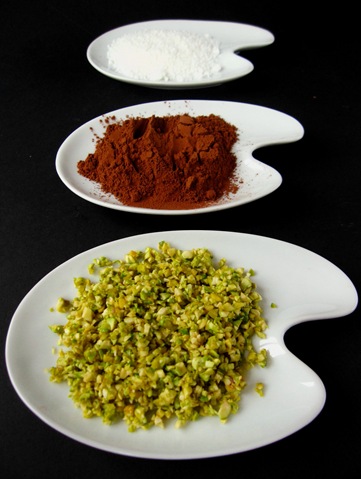
Prepare your coatings…
IMG_3412
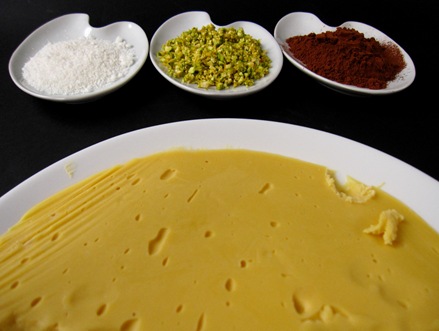
And get your ganache out…Ready? If you wanted them square, you could place the ready made ganache in a mould covered with cling film to unmold easily.
IMG_3413
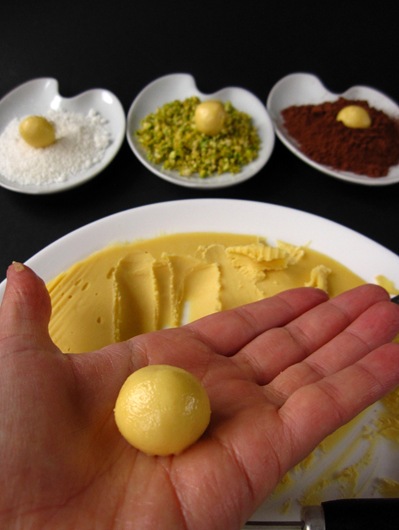
With a small spoon, take pieces of ganache the size you want and with your hands round them up. If you find it sticks a bit, grease your hands with a bit of a neutral oil that will give the truffles no flavour.
IMG_3416
Place them on your coatings and cover them completely before they dry a bit on the outside.
IMG_3418
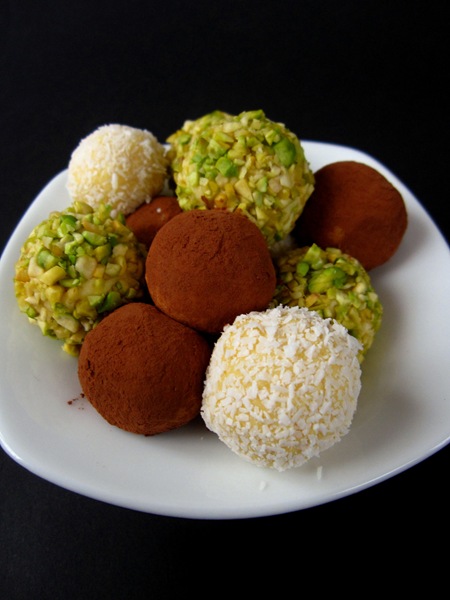
And that’s it! Enjoy!!! or keep well covered in an airtight container in the fridge or freeze them and take them as you need them!
IMG_3421
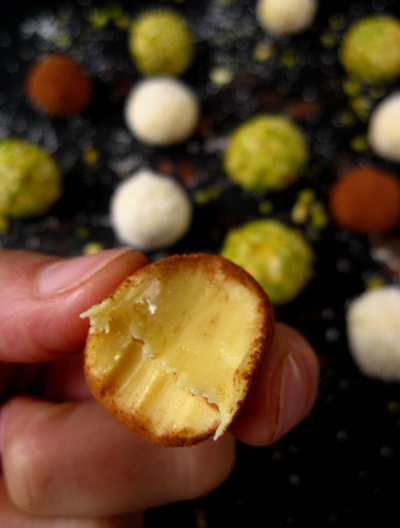
You’ll see how they just melt in your mouth to release all that intense but refreshing flavour!
IMG_3433
continue for recipe...