September 19, 2010

Melt-away “alfajores de maizena” with “dulce de leche”

IMG_1834
Cornstarch alfajores have been and I have to admit, still are, a continuous quest for the best recipe yet. You know, with some recipes, although to most people the results are good or even really good, to me there’s still something that doesn’t make it just right. True, I am a bit obsessive at times, what can I do? So, I give it a break testing…until the next time.
I first tried alfajores over 6 years ago in an argentinian café near my house, which now doesn’t even exist. Those were huge, about 15 cm wide or so, they must have had some corn flour (not cornstarch) added to them, as they had a specially characteristic crumbly texture and a yellowish hue (not from dyes, I’ve read in many pastries in Argentina, they are lightly coloured). Apparently an argentinian woman made them and sold them to the café. But after a few times that I repeatedly had them as a snack, one day the alfajor they brought me was completely different. I asked and apparently the lady stopped selling them so they had bought others, which were not even half as good!
Then, years later in a food chain named “Delina’s” a spanish copy of the british (I think) “Prêt à Manger” I discovered these little (well, average size: about 4cm wide) cornstarch ones. They are, to me, close to perfection, in a different way to the more rustic corn flour ones I had tried and loved before. They really would melt in your mouth, had a super crumbly soft texture that I had not found in any other alfajores I had tried up to then (whenever I saw an argentinian place, I had a go to see if they were as good as the ones I remembered).
IMG_2118
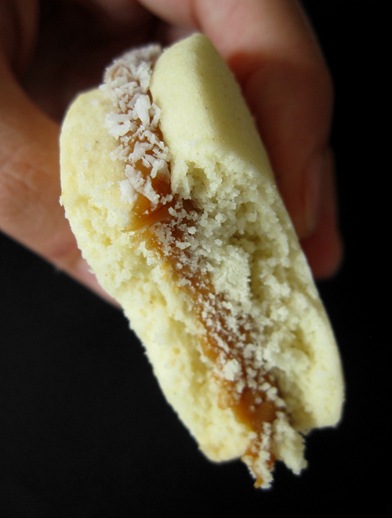
So, the alfajores I’m presenting to you are the closest I’ve come so far to that supercrumbly melt in your mouth feel. Not like the corn flour ones…which I still have to work on with both fine semolina and different corn flours. What’ special about them?… other than being a result of endless testing :)? Most alfajor recipes have yolks (or even some whole egg) in them to give them structure, but for a more crumbly, melt-in-your-mouth texture I just use cornstarch & flour, butter, sugar and the flavourings (brandy, lemon rind and vanilla) like for traditional spanish polvorones. Can you tell (from the photo) how crumbly they are but still hold their structure to shape and eat without falling apart?!
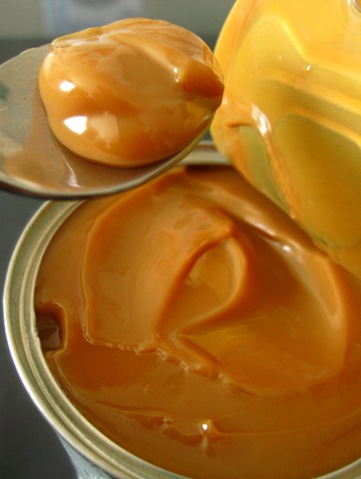
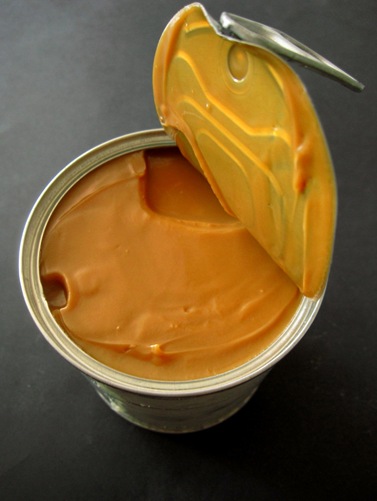
About the dulce de leche, I used to buy “La salamandra” brand, which is one of the best commercial ones I’ve tried and found here, but though not the real thing, the cooked condensed milk can trick works for me as I’m more concerned about the texture of the cookies. But if you want a fantastic dark, intense dulce de leche (this one has a great texture but doesn’t get as dark and flavourful) you can either you get it or take the time to be watching it as it reduces with the traditional method using this recipe for instance (see well explained method here).
IMG_1330

Melt-away alfajores de maizena with dulce de leche
(enough for about 15 alfajores of 4,5cm in diameter…or many more smaller ones!)
For the alfajores:

110g of cornstarch
45g of flour (a soft flour is best if available, like cake flour)
120g unsalted 82%fat butter
3/4 tsp baking powder (optional)
40g caster sugar (I just whiz granulated in the spice grinder)
1 tsp cognac/brandy (optional)
1/4 tsp of pure vanilla extract or substitute some sugar for vanilla sugar (optional)
1/2 tsp of lemon rind (optional)
pinch of salt
For the dulce de leche:
1x 370g or 400g condensed milk can (I used La Lechera, apparently different brands give varying results, but I haven’t tried)
Also:
Grated coconut
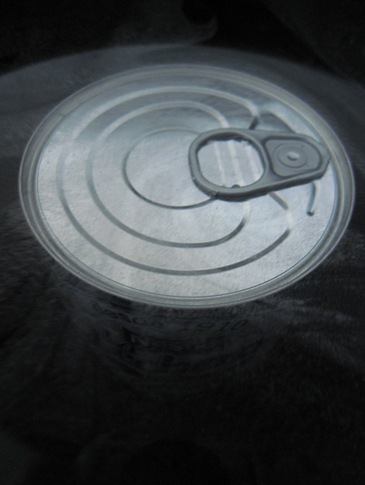
I’d start preparing the dulce de leche as it takes time!All you need to do is place the can in a pot that if filled with water it covers it completely and…cover it!(with water I mean). This is important, the cooking will take in between 3 to 4 hours depending on the thickness of the dulce de leche you want, and all you need to be concerned in the meanwhile is that the can is well covered at all times with water.
IMG_1265
So cover it and set the timer…and forget about it, if well covered with water,until it beeps! I’ve read many warnings about this method to obtain dulce de leche saying that it can burst! I haven’t ever had a problem, all you need to make sure is to not touch it once it’s finished cooking until it is completely cool. If you open it still hot it can burst out! But if you are patient to let it cool, nothing should happen. So, I’d advice to prepare one day in advance and open and use the next day.
Also, some people use the pressure cooker…and in this case I am sceptic about security, as all cans now are easy opening, and I’m afraid it might open in this case. But if you are braver than me, you can check out the times appropriate for the same results…
Can you see how thick and nicely coloured after 3 hours. If you leave for a bit longer it thickens and darkens even more!
IMG_1317
If you like it, I’d suggest you do more than one can at a time, as since it takes over 3 hours, you might as well leave them ready for other uses (they’ll still be unopened and keep for ages!)
Time to prepare the dough! I suggest you sift the cornstarch and the flour together to get a finer result, as once added to the butter and sugar mixture, as all pâtes brisées, the less you work them, the crumblier the result as you don’t develop the gluten. So, by sifting you make sure the resulting dough will be smoother.
Also, if you blend the sugar yourself to make caster sugar (actually, specially if you do, but even if it’s store bought) it’s also a good idea to sift it to make sure there are no lumps and it is all thin.
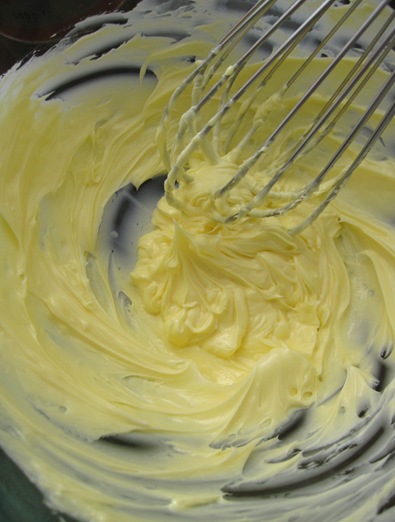
So, just cream the butter, it’s best to have it at room temperature (I just chop it up a bit and place it in the lowest power in the microwave to soften, NOT melt).
IMG_2121
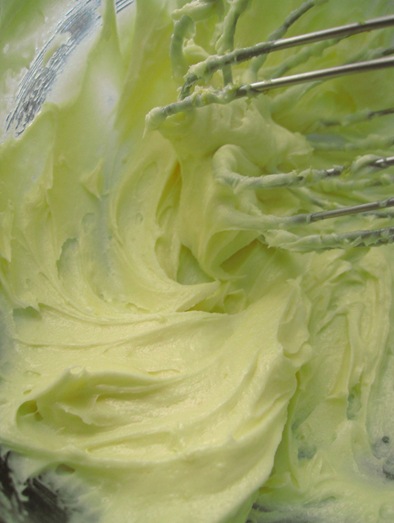
Then, add the pinch of salt and sugar. If the salt is not very fine, it’s best to either mash it to powder it with a pestle or whip for longer to make sure it dissolves.
IMG_1787
Once creamy, add the flavourings. The three I’ve used are the traditional: lemon rind, cognac and vanilla (I prefer substituting some of the sugar for vanilla sugar as both the extract or a few seeds feel too strong for my taste) but think of other possibilities you may like for versioned alfajores (like cardamom, orange rind, or coffee powder,for instance…you can also vary the filling).
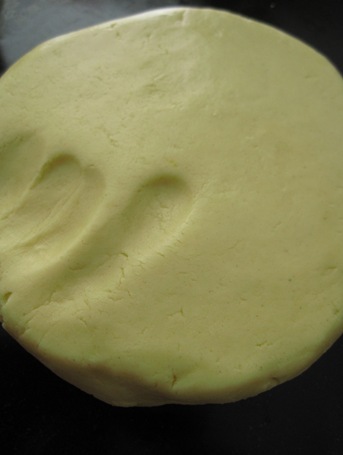
Finally, when all is well blended add all the flours (both flour and cornstarch) with the baking powder (also sifted) if using: it helps lighten a bit the texture, but many times I don’t add it in. They should be incorporated into the butter mixture as quickly as possible and just until homogeneous.
IMG_1789
that’s it. It’s best to rest it in the fridge (wrapped in cling film) for at least half an hour, for the flours to hydrate and the butter to get harder which makes cutting off the rounds easier.
When ready, strecht it out into about 4-5 mm thick (they’ll puff slightly in the oven) so I would suggest you don’t make them thicker. Ah, I stretch it over cling film or parchment so you can lift them up easily without them sticking to the surface. Also, you can flour your rolling pin if the dough sticks a bit, to get a smooth, clean sheet of dough.
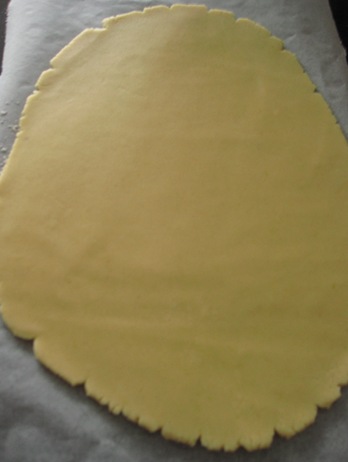
IMG_1792
Then just cut off rounds with a cookie cutter or around the rim of a coffee cup…
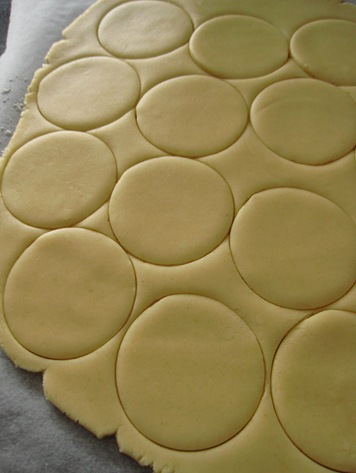
IMG_1794
Remove the dough around each and lift each round up and place on a sheet of parchment or a silpat. And put all leftovers together and roll out again…until you’ve used up to the last bit of dough! Nothing is wasted here!:)
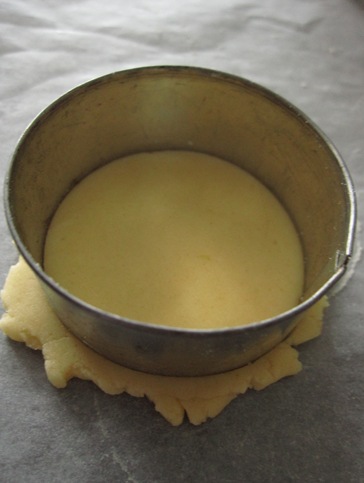
IMG_1795
Here are the cookies ready to go into the oven…
IMG_1796
Can you see how smooth the dough is? It’s really easy to work with.
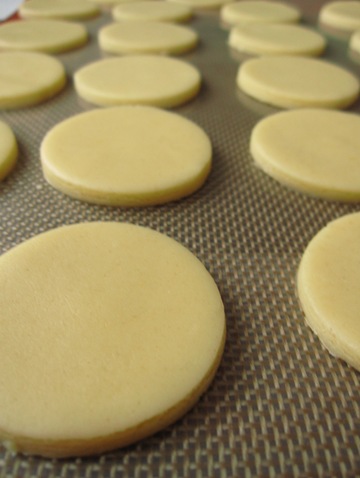
IMG_1798
I advice, if you have space, you place them while the oven is preheating in the fridge so they spread less when they go in, as the butter is colder and takes longer to soften as the flour cooks.
Cooking times and temperatures…I’d say it depends on the result you wish: At 180ºC in about 8 minutes, or until it just begins to colour the cookie stays moister inside while being well-cooked. On the other hand, at 160ºC it still retains its shape, takes a bit longer, about 10 minutes and the result is slightly drier. I preferred the 180ºC for shorter time, but you may prefer the other texture!
And that’s it!!!They are ready to be filled in with your tasty dulce de leche or your filling of choice (nutella or any other chocolate spread, thick lemon curd (they wouldn’t be traditional any more, obviously!). I use a piping bag for this…
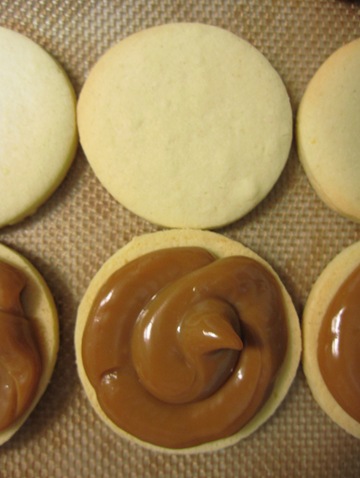
IMG_1802
Ok, I’ve been generous, you decide how much you add…Then just put each top over the filling and press lightly so that the dulce de leche fills the whole cookie and pops out a little…to be covered with super tasty grated coconut!
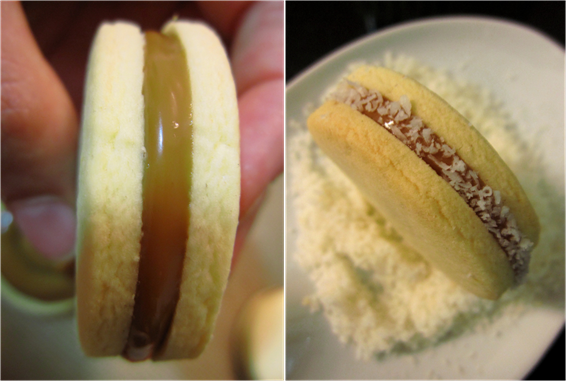
Imagen1
Sometimes the dulce de leche is smothered over the sides so all the sides are covered with grated coconut. I like it this way, less manipulation for these delicate beauties, but up to you to try and decide! So you have enough to sweeten up your week!
IMG_1835
My favourite trick is to leave them at least 24 hours in a tupperware in the fridge (better after 48hrs). This is done to the “macarons” in France for best texture and is a MUST! In this case I find that the moisture distributes and the cookies are softer and blend better with the filling, if that makes sense. I do notice the difference a lot…even Linguini does, so if you can wait, keep them well covered so they do not absorb funny flavours from the fridge and leave them at least 24 hours, and decide if to your taste they improve or not! See the result?
IMG_2117
Here’s just a few of the testing photos to show you I’m not lying when I say I’ve almost taken a master on alfajores!
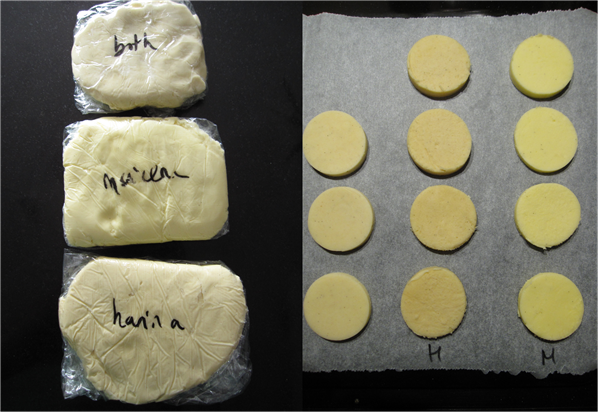
Imagen2
And that not all tests are successful!
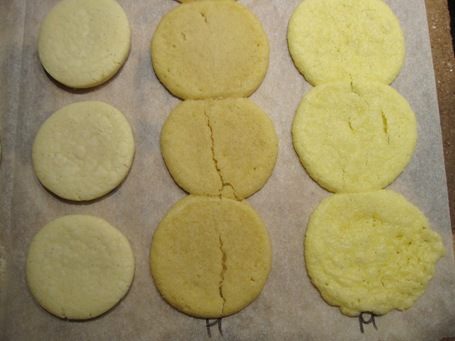
IMG_2133
OK, the two on the right have the same proportion of butter and flours, which obviously is way to much butter to maintain the shape!! Funny the colour differences, the brownish all flour, the yellowish (from the butter) all cornstarch and the blended more white-grey:
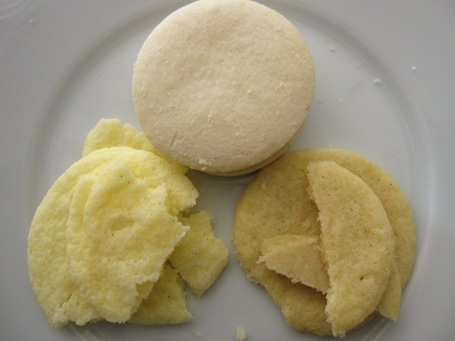
IMG_2134
Still took some more testing to determine best cooking temperature and times with different recipes…
 
All this, for a little bite of heaven! I think it was worth it! I hope you enjoy them!
continue for recipe...

September 6, 2010

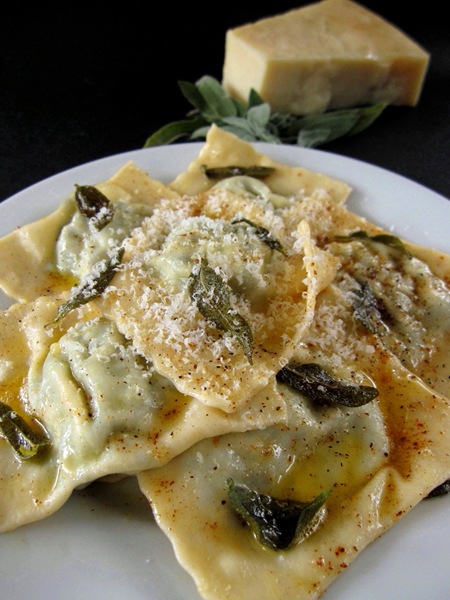
Spinach & ricotta ravioli with sage beurre noissette

IMG_1994

I guess in english it should be called “brown butter” but since it’s a bad description of this delicious, nutty cooked butter, I prefer to use the original french name for it (does this sound a bit pedantic?!? I just mean to say that I like that the french name already describes it’s nutty taste!). Anyway, I actually preferred the name by which I first tried it, though it says nothing about the butter being toasted: “ravioli di ricotta e spinaci al burro e salvia”. From the moment I tried it, I felt in love with it…I think they were the first two words I learnt in italian: burro e salvia (well, actually just one, burro, as sage is also called salvia in spanish! Nevertheless, I think it was the first time I ever tried it. And it still is how I like it most!)

Lately I’ve been playing around with my pasta machine making pasta with different flours to test (& taste) the difference. Up until recently I used to make pasta with soft flour, all-purpose flour, that is. But Ajonjoli from the fantastic blog (in spanish, though) “La flor de calabacín” (the courgette flower) suggested I tried making it with fine semolina instead, as it withstood better the boiling time and resulted in a more al dente texture. I wish I could have tried it…but I still haven’t managed to find the semolina “rimacinata” from De Cecco (or any other, for that matter) which I remember having seen sometime in El Corte Inglés (a big department store in Spain) some time ago (before I realised I wanted it, of course). It seems like every time I go they’re sold out or they don’t sell it anymore!!!

IMG_1934

Anyway, as I was saying, I wish I had tried the version with superfine semolina, or with italian 00 type flour, the one actually used in Italy for fresh egg pasta (the semolina is used for dried pasta made with water) which I’ve been also trying to find for about the same time! But, in the meanwhile a work mate advised me to make it with strong flour instead of all purpose as it made a more resistant pasta. She was right! Since then I make it with wheat flour with higher protein % than the average all-purpose, so it has a bit more gluten, but avoid those really strong flours as the dough is way too elastic to handle easily. When I manage to get the other two, I’ll let you know the results.

So, I won’t bore you any more, I leave you with this tasty recipe for handmade raviolis with this delicious hazelnut butter with crispy sage. It will teleport you to Italy!

IMG_1978

Spinach & ricotta raviolis with sage beurre noissette

(enough for 6 people)

For the pasta:

~ 300g bread flour or italian flour type 00

3 L eggs

(optional & if needed, some warm water)

For the filling:

250g ricotta cheese

300g fresh spinach

~50g grated parmesan

pinch of salt

pinch of grated nutmeg

freshly ground black pepper

1 egg yolk

15g butter or oil for sautéing the spinach

For the sauce:

a few sage leaves (10 or so)

~125g of unsalted butter

Plus for serving:

some extra grated parmesan

freshly ground pepper

a pinch of salt


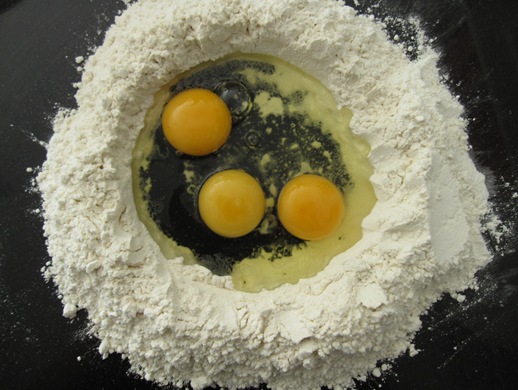
Begin by preparing the pasta as it needs to rest at least 20 minutes before rolling it. There are two ways to do it. As I once read, one is the “italian way” in which you just heap a generous amount of flour without regard to measurement. Then you make a well in the centre to hold the number of eggs you want (in this case 3 eggs) and then you begin to mix them with the flour in a circular motion, with a fork or the hands until they absorb enough flour that comes together into a stiff dough and then it is kneaded. The extra flour is sifted to be reused.

I remember watching Jamie Oliver on a pasta-making (and rolling) competition in a little town in Italy. Here’s the video, if you can wait for it to charge, as it’s right at the end! You can’t beat the mama’s!!

The other method is to put in a bowl approximately 100g of flour per egg, so in this case 300g. The problem of this is that the absorption of each flour is different plus humidity also affects it and egg sizes vary, so it isn’t exact science! If you choose to do it this way, if you are short of egg for the flour you’ve got and it’s already all mixed in, add some warm water until you get the right texture. It should be a fairly dry and tough dough.

I prefer the italian method, I always get a little extra flour out and just use the amount the eggs take in.

Imagen1

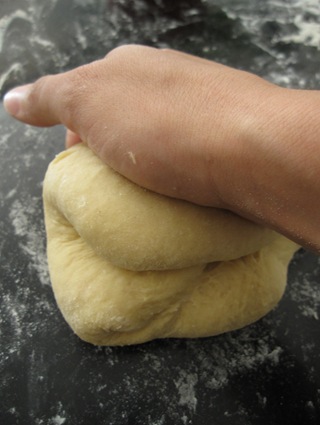
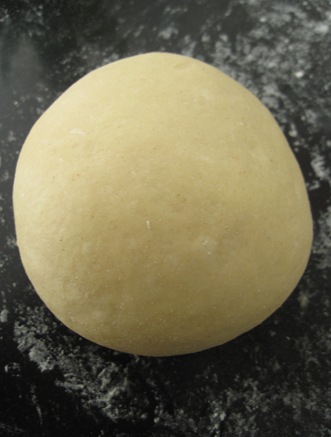
Then, knead and knead the dough by folding the dough in half and pressing down hard with the heel of your hand, half turn, fold and again…

IMG_1942

…until it’s baby bottom’s soft!!It should feel really smooth.

IMG_1943

Wrap it with some plastic and rest it for 20 minutes to relax before the rolling out.

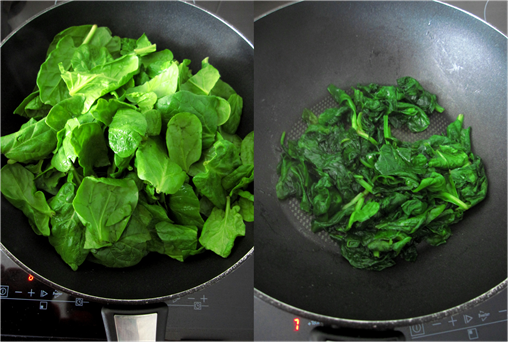
Time to make the filling, this one is really simple. Just cook the spinach, I like to sautée it with a bit of butter and then season it, rather than boil it which leaves it with a bland taste unless you slow fry it a bit afterwards. So, just add butter or oil to a wok or large pan and when hot, add all the spinach or in two times and cover it for less than a minutes, until it is soft.

Imagen1

Then just strain it to remove excess juices (a lot will come out!) and chop it up finely and let it cool slightly before mixing it with the ricotta.

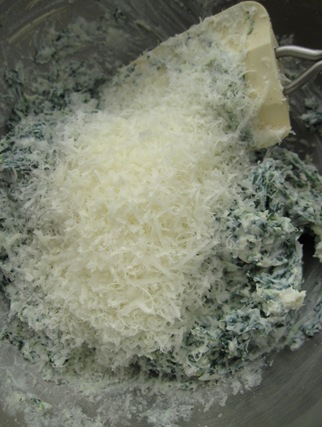
Once cool, break up the ricotta, add the spinach and rest of ingredients: grated parmesan, black pepper and salt to taste and the whole egg or yolk until smooth but still thick paste.  You could use a spoon to fill the raviolis, but I prefer to use a piping bag, it’s cleaner and easier.

IMG_1960

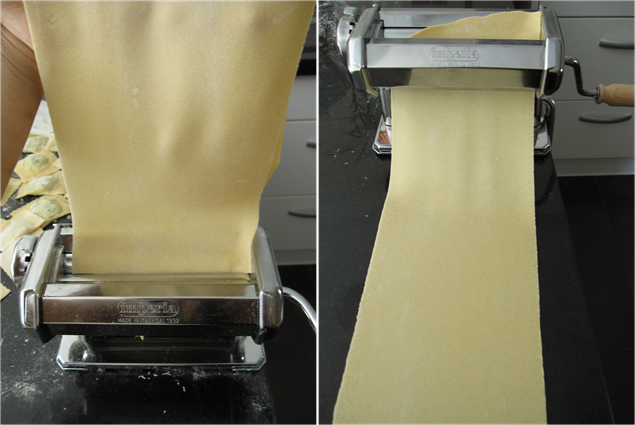
Now the trickiest bit if you are not used to rolling out pasta, which by the way I do with a machine. It can, of course, be done by hand, with a large rolling pin, but though I am romantic about artisan work…I love my pasta machine! and for filled pasta I think it’s great as you can get it really, really thin!

So, to start, I place the pasta machine on number 1 (the thickest setting) and run the pasta at least 4 times. This is like extra kneading, it works the dough to get it really smooth. So, you run it one time, then fold the sheet you get by half or in thirds (like a letter) and run it again to try to get a smooth sheet with the width of the machine.

Then, just run it on each number up to the highest one (mostly it is run over just once, but I prefer to do it twice on each, so the sheet doesn’t twist towards one side as the thickness is reduced due to elasticity of the dough).

For most pasta shapes I just run it until number 5 (6 is the maximum on my machine), but for filled pasta, though it’s more delicate, I like to run it super thin as once folded the thickness is folded and the feeling in the palate is amazing!So thin, so smooth, it almost slips off!

Imagen2

Make sure you keep the sheets well floured as you roll them out, or they make stick to the machine.

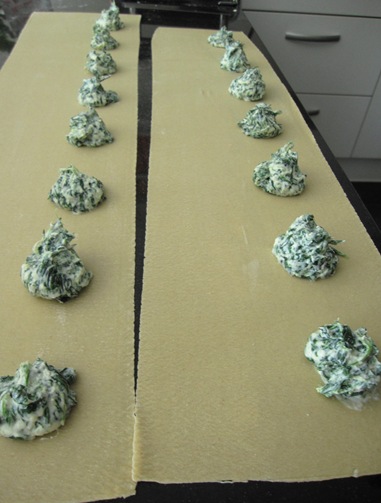
When you have your sheet ready, flour the bottom so it doesn’t stick, as you fill it up. and though there are many ways to do this, this time I’ve gone for the easiest one and the one that leaves you less cut offs. You will place spoonfuls of filling (with the piping bag) at about 3 cm intervals (depending how much filling you want in relation to pasta around) on the bottom half of the sheet, so you can then fold in half width-wise. But, you could also place spoonfuls on the top half to later put another sheet on top.

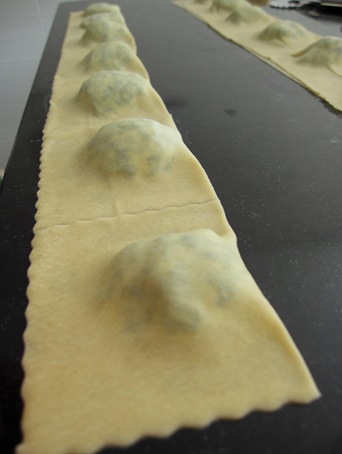
IMG_1973

Then, with a cup of water at hand, wet your finger or a brush and run it around each dollop of filling. This will make the pasta stick to each other!

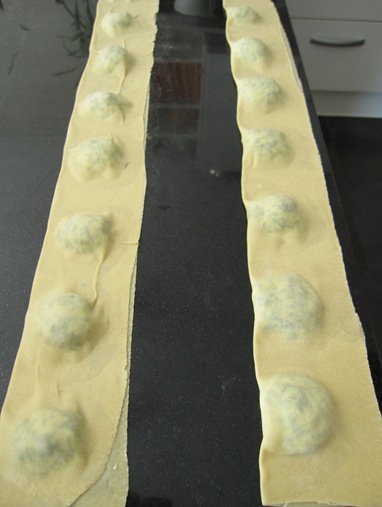
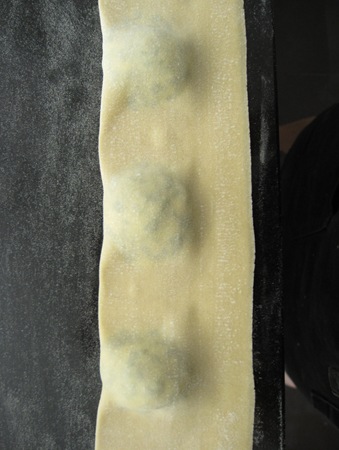
Then, just fold each sheet in half over the fillings and with the side of your hand press the air out in between and around each filling as best as possible.

IMG_1974

You see?

IMG_1976

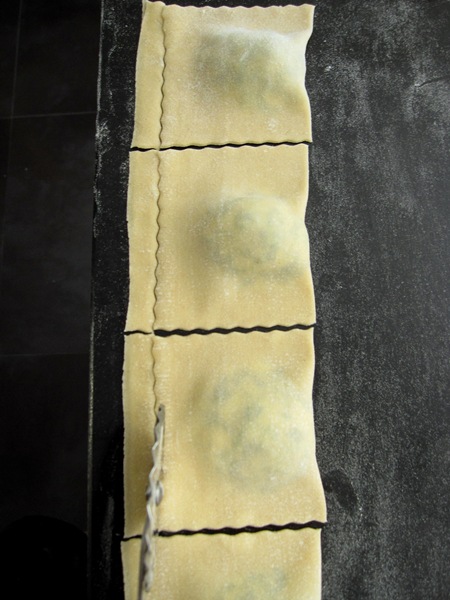
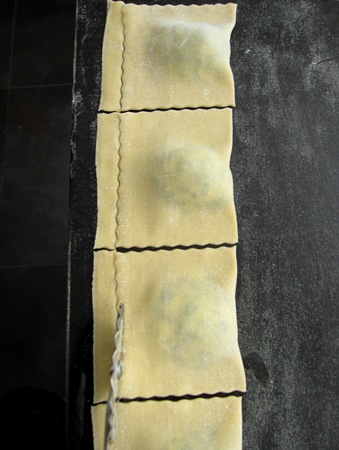
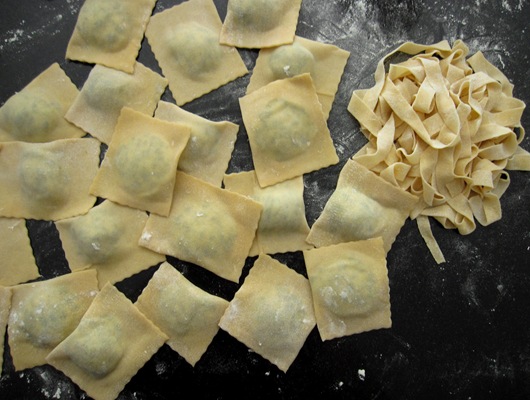
Then, with a sharp knife or a pastry cutter, cut the raviolis. As you can see, folding them by half this way , you only need to cut the other three sides, so it saves you a bit of work. If you have cookie cutters bigger than the size of the filling, you could cut around it, or you can do it with the pastry roller.

IMG_1978

IMG_1975

Make sure you place your finished raviolis over a flour-dusted surface! because if they stick say goodbye to that filling! Continue to do the same with the rest of the sheets…

In the end I ran out of filling and with the left-over sheet, I made some tagliatelle!

IMG_1982

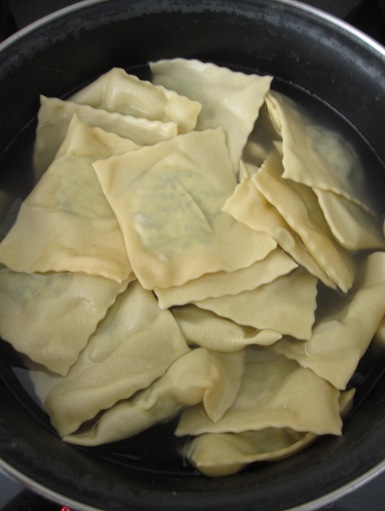
Get your water boiling, salt it and cook them over moderate heat, so it doesn’t bubble to strongly! They are fairly delicate!

IMG_1984

When ready, they’ll take about 3 minutes, just strain and cool down unless you are ready to serve. In which case you should have your sauce ready so they don’t stick!

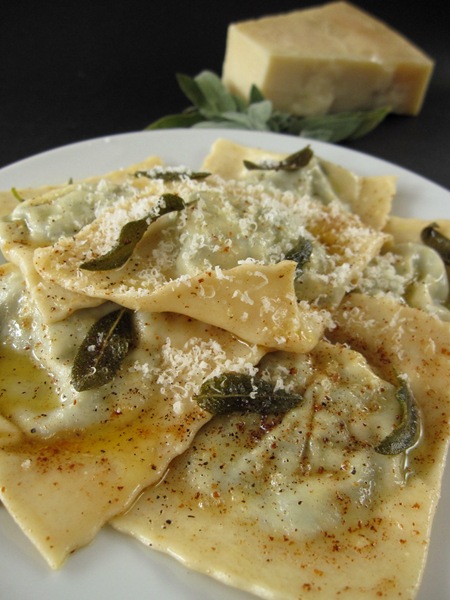
For the sauce, just melt the butter. When it starts bubbling, add the sage leaves, they will crisp up and the flavour will get a bit more mellow, but it’s still a pungent herb, so make sure you like it before adding too much. About 10 leaves will do it. Then, just let the butter start to colour. The milk solids will fall to the bottom of the pan and begin to get a golden colour. Stop it then as it will continue to cook even if you turn it off and you don’t want burnt butter!

Just mix with your ravioli and season with salt and pepper to taste. To serve, grate some parmesan, extra pepper if you like and some of the crispy and tasty sage leaves. Buon appetito!

IMG_1992

Opps, you will forgive me, I forgot to take a photo of the yummy filling! :(

continue for recipe...

September 1, 2010

Meltingly soft burnt aubergine spread

IMG_1027bis

This "recipe" (if you may call it that...rather it's a technique) is for those of you aubergine lovers, who like me, appreciate the SMOKY (in capital letters) flavour of charcoal grilled food (to me almost anything barbecued over wood coals tastes better). I'm saying this because the flavour is really intense and though to me it’s superb, many people who've tried it, to my surprise, find it too strong! So, I'm not sure how many of you might like it, but since I love it, I had to share it.

Do you know Yotam Ottolenghi? He's a talented chef from Jerusalem with Mediterranean influences, who gave name to a restaurant-take away in London (now with 4 branches) with fresh, healthy and appealing dishes, pastries and bread made with produce of the best quality. Their dishes were such a success that he, together with his partner, also chef at Ottolenghi Sami Tamimi, created a beautiful book with some of their most demanded recipes. I discovered this book on the net and had to get it, it didn’t disappoint me; it’s vibrant, the dishes are fantastic and the photographs reflect their philosophy. He recently published a new vegetarian book titled “Plenty” which I couldn’t resist getting as well…

IMG_1035

All this, to tell you that in their cuisine, with strong Middle-Eastern influences, they use aubergines in many recipes…In dips they try to impart that aromatic smoky flavour by charring the aubergines, which they accurately name “burnt aubergine”. I’ve always done that with red peppers by roasting them over the flame on a gas hob at work (I cannot do that at home since I have induction! :( It wasn’t a choice!). But, I hadn’t yet tried it with the aubergine that way, so now that at work I have excellent gas hobs, I had to try it! I made the first, and ahhh, the charred aroma on the kitchen was fantastic…but the magic revealed itself once I peeled the completely burnt skin to find a tender, almost caramelised pulp with the most wonderful smoky flavour.

IMG_0987bis

But like I say, to my surprise, not everyone appreciated it as much as I did. Linguini tried it and said it tasted like cigarette!!! Please do not believe him!!It is a really intense smoke flavour, true….But NO resemblance whatsoever to a cigarette! What else can I say? If you like aubergines, when cooked to melt-in-your mouth consistency and you do like smoky notes, you will love this…furthermore, it’s ready in 10 minutes!!!When the usual bland whole oven-roasting takes even longer than 40!!! You can just season it with garlic, lemon juice, salt & pepper, and olive oil to preserve all the aroma or blend it  with some yoghurt to lighten it a bit or for other dips like baba ganuj. I hope you like it as much as I do!

Burnt aubergine spread

(for 1 aubergine)

1 aubergine

1/2 garlic clove or more to taste

salt & freshly milled black pepper

drizzle of lemon juice to taste

1- 2 tbsp of mild flavour olive oil

optionally: 1 tbsp of greek yoghurt


Like I said, this isn’t really a recipe but a technique to char the aubergine to get that distinctive smoked flavour in a matter of a few minutes if you are lucky enough to have a powerful gas hob.

I guess there’s not really need as you’ll completely burn all the skin, but I like to wash & dry it anyway.

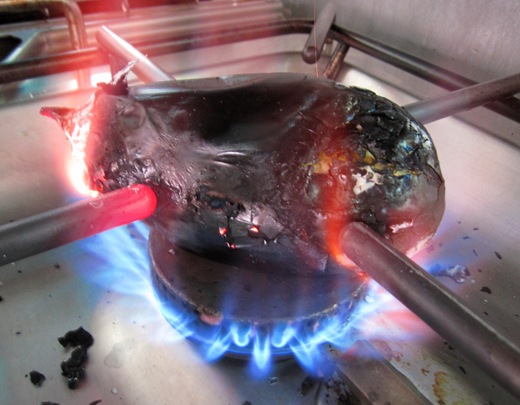
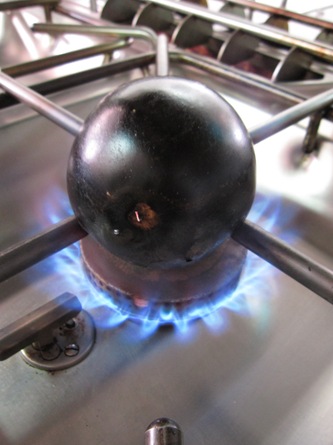
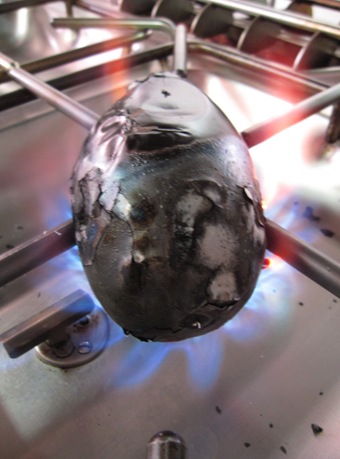
Then, just place the heat to a medium-high flame and with some thongs place the aubergine right above it. (Medium-high on this hob will most likely be high on any home hob…it should start to burn the skin within a minute, if it doesn’t raise it to maximum power).

IMG_0971

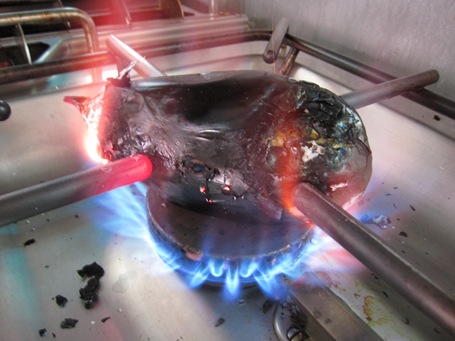
Then once one side is burnt, you can see it crackles, turn it. This will take less than 5 minutes…

IMG_0978

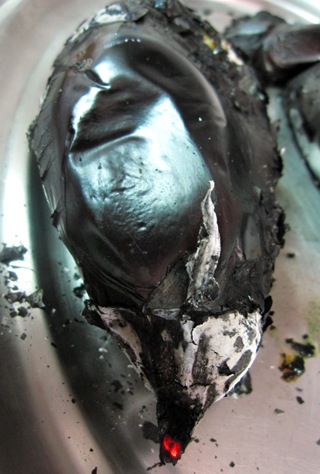
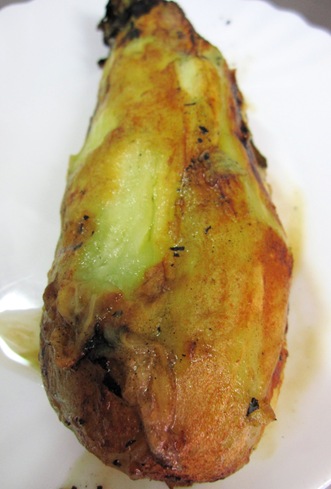
And just keep turning it to make sure all sides are equally burnt. It took me less than 10 minutes but depending on the gas power it may take longer. The idea is to burn it as quick as possible and surprisingly in such little time the inner flesh will collapse to a butter-soft consistency!

IMG_0987

You can probably tell the pulp underneath looking a bit golden and the crackled skin. It’s almost ready…Once it is, just let it cool down enough to peel (this one is just off the fire!)

IMG_0989

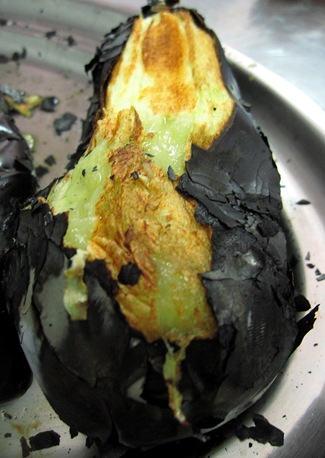
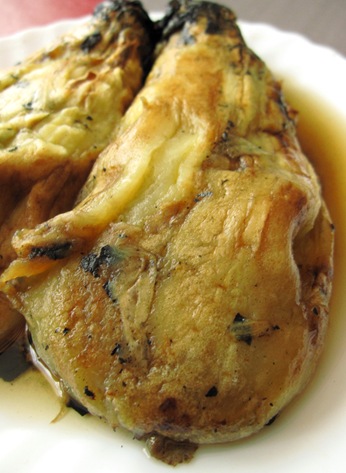
And look underneath the burnt skin! (try to remove as little of the pulp attached as possible)

IMG_0994

And with the skin completely off:

IMG_1000

As it cools it releases it’s tasty smoky juices. If you want a thicker spread, remove them (you can save them to impart that aroma to another dish) or leave them in for a softer dip.

IMG_1010

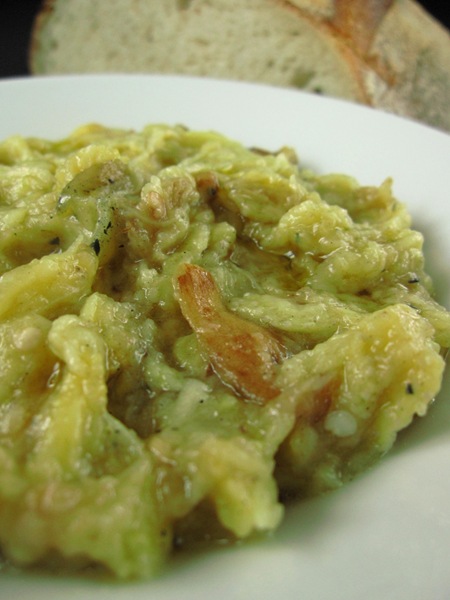
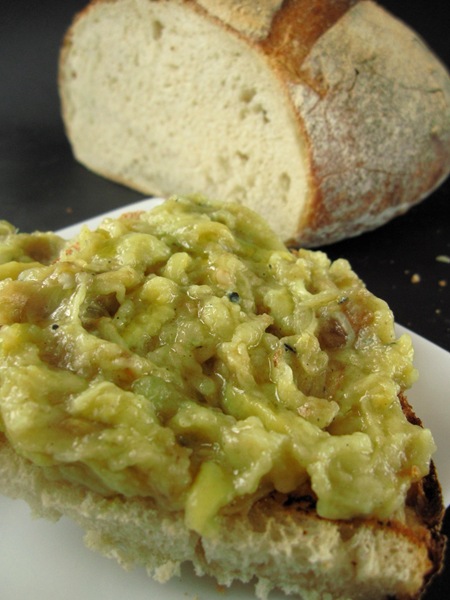
And to me, it needs as little as the ingredients listed to season it. Just pound it with a pestle into a rough mash, or if you prefer blend it with a processor, but I prefer the texture of the pounded one (it’s so soft, even a fork will do). Then season it with salt and pepper, the grated garlic to taste, I like just a hint, something hot is optional (some dried chilli) and something sour: I use lemon juice, but it’s been over a year that I’m searching for pomegranate molasses (widely used in middle eastern countries and that Yotam Ottolenghi often adds for a sour and tasty kick!). Finally some oil to blend all and smooth the whole and…I LOVE IT!! See what you think!

IMG_1016

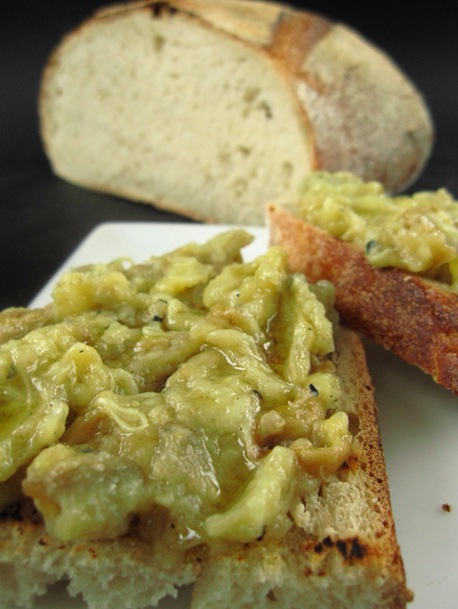
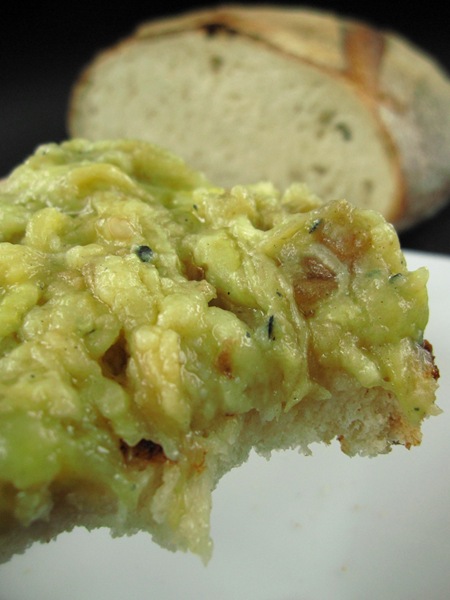
I made some sourdough and as a bruschetta it was fantastic, no more seasonings, no decoration, no nothing, just tasty bread and sumptuous aubergine spread!

IMG_1047

But served on a dish accompanied with some pitta bread to dip in, it should also be fantastic!

IMG_1032

continue for recipe...