December 11, 2010

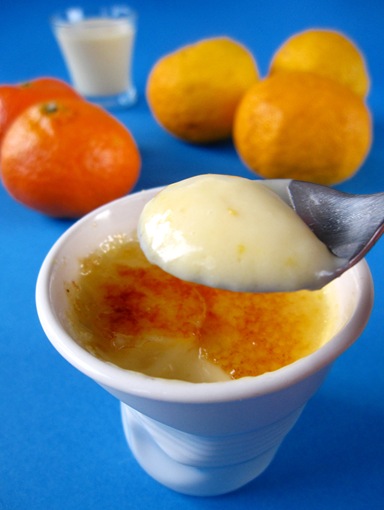
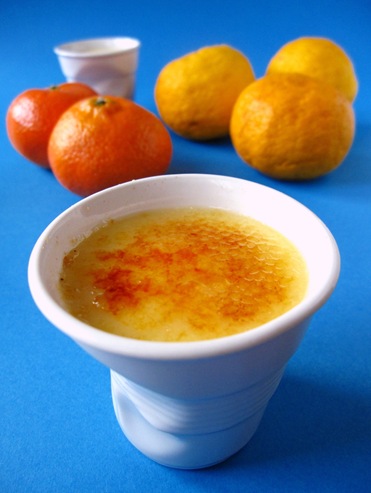
Yuzu “crema catalana” custard

IMG_2855

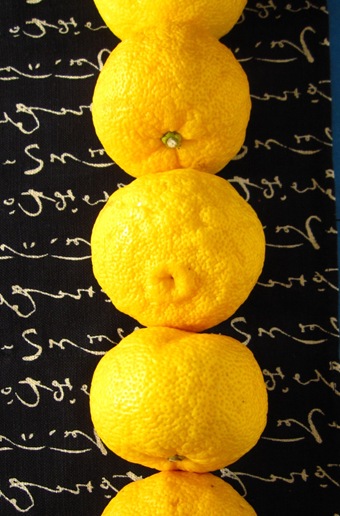
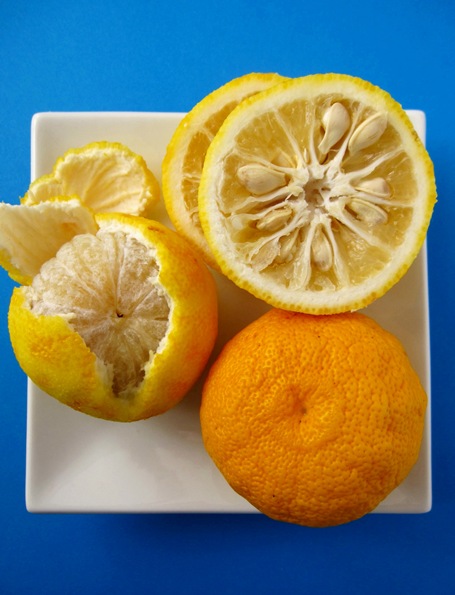
I’d like to dedicate this post to my brother…amongst many other things because thanks to him I’ve got hold of fresh yuzu for the first time! I discovered yuzu juice a few years ago when working at a restaurant I bought it just to try from Cominport, a supplier of Japanese products (sorry, their page is either in spanish or japanese). I absolutely loved this japanese citrus strong aromatic flavour, but up until now I had never even seen the fruit itself or used the even more intense rind! To me it’s like a light-hued mandarin with a bumpy rind (as if it were a hybrid of keffir lime), with an aroma much more intense than a tangerine but with little juice and full of large seeds (which I will try to plant and see if I can grow a tree!!).

My brother went to Japan for holiday and amongst other amazing products brought these back for me. But…I wasn’t too sure on what to best invest these five jewels and time has been also as precious these last two weeks. So, up until yesterday I hadn’t even decided what to make with them…Thought of making yuzu marshmallows (you know I’m not too fond of sweet stuff, so my favourite marshmallows so far are on the sour side: lime rind and coconut and also maracuya or passion fruit and Kumquat. So yuzu has to be nice! I also though of some seared scallops with a soury beurre blanc or a delicious curd to use as a macaron filling or for small meringue tartlets (but I’d rather share with you my so far favourite maracuya curd some time soon). So, decided on a crème brulée type of cream…

Yuzu on the right, mandarins on the left to show difference in colour

I infused the cream with the grated rind, after trying to juice the fruit with no success (barely a drop had come out!) I blended the pulp with some extra cream and sieved it to mix with the rest to add the sour touch and mixed it with the yolks and sugar and let it cool down covered to let the flavours come out. Meanwhile we went out to enjoy the second sunny day in a long while! So, Linguini asked me what I was going to make to share with you and as soon as I told him crème brulée he disagreed with me! “But you’ve already published a crème brulée recipe!It should be something different”. The truth is that although the proportions are not exactly the same, if you have one recipe you could easily figure out how to change aromatic ingredients and balance the recipe. So, I had to think of what to do with the cream with egg yolks already mixed in!

I instantly thought I should have made a panna cotta. I love panna cottas, delicious, no need to heat up ingredients to keep all their fresh flavour if needed and super easy to make, just a matter of getting the perfect amount of gelatin to get a just set but trembling soft cream…but I already have a panna cotta recipe reserved. So, I came up with a “crema catalana”, which is simply the spanish version of the crème brulée but thickened on the stove instead of on the oven over a bain marie. So know, you’ll have two ways to make your crème brulées depending on your variables. For instance if you want it to set on special moulds that cannot be placed in a bain marie or in the oven, like cut bamboo canes or on japanese spoons like Haalo from Cook Almost Anything does here, this is a convenient and quicker way to do it! So, let’s get onto the recipe…

IMG_27322 

Yuzu “crema catalana” custard

(enough for 8 small ramekins)

500g of fresh cream (you can use only whole milk or 1/2 milk + 1/2 cream)

80g sugar

15g cornflour

5 yolks of M-sized eggs

2 whole yuzus (grated rind+processed deseeded pulp)

pinch of salt

optional: ~20g of butter (unsalted)

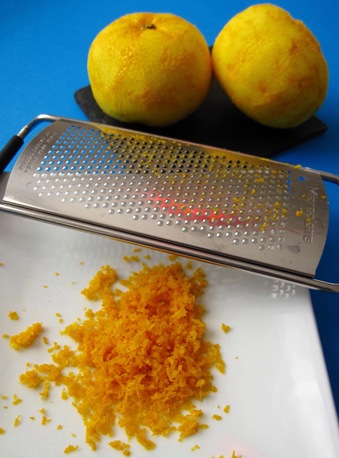
Bring your cream or/and milk to a boil and meanwhile grate your yuzus rind…

IMG_2852

Do not waste a pinch…all that is precious supertasty rind! When the cream boils add the grated rind and cover with cling film to infuse for a while.

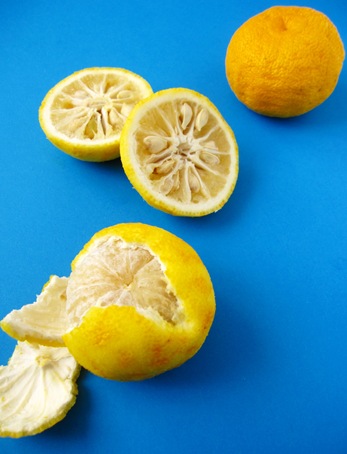
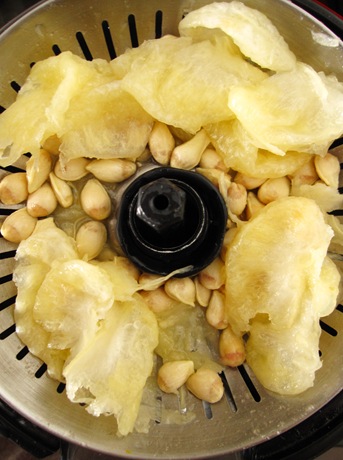
Then, cut your yuzus in half to remove the seeds. Can you see the amount of seeds it has?

IMG_2860

Well not only does it have loads of seeds (to hopefully grow a tree) but also it has barely any juice! This I just found out (now I realise why that tiny little bottle I bought was so darn expensive…not only because it comes from Japan!). I did not realise until I tried juicing and was left with just blobs of pulp+seeds! Great start!

IMG_2861

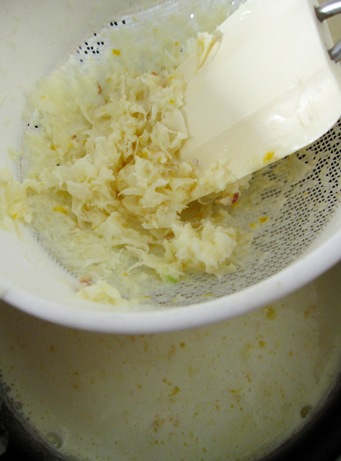
So, instead of my bright idea, do not attempt to juice the yuzu, just process/blend the pulp with some of the cream and strain it all back in, you must strain it or you’ll be left with this:

IMG_2865

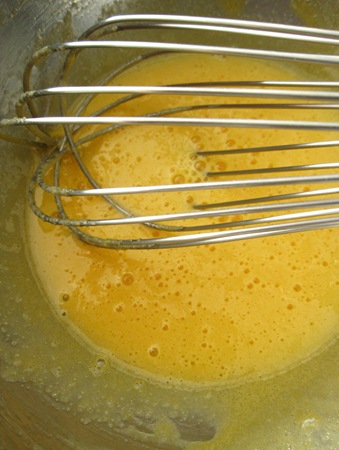
In another bowl beat the egg yolks with the cornflour and the sugar. Many people when preparing crème brulée beat yolks+sugar until pale and thick. This is mainly done to dissolve the sugar. So, since the hot milk will dissolve the sugar or if you leave it to rest for a while before placing on ramekins to set it will also end up dissolving, I never bother…Plus, then you need to remove the little bubbles on the surface so they don’t set!so, why the extra work?

IMG_2866

Add the milk slowly whisking at first so it doesn’t coagulate the yolks, and then strain and return to the stove (the straining part is to remove any bits of egg white) By the way, I used a fairly thick strainer to let the rind pass through to not waste any of it, but if you prefer not to find it for a smoother finish, use a fine-mesh one.

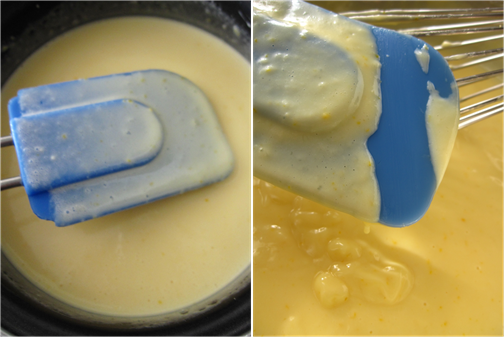
You can leave this done and just thicken it when you are ready. I left it for a few hours to bring out the taste further, but you can go on to thickening it straight away. In that case, over low heat bring up to about 82-85ºC, or just until it thickens enough, so when you run your finger it leaves a mark…

Imagen1

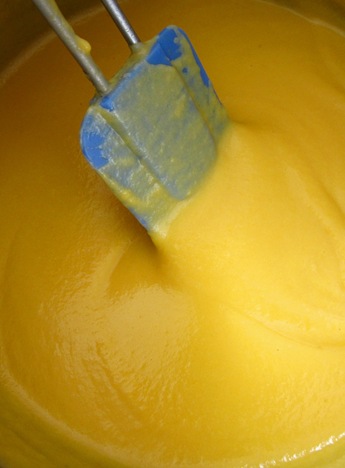
When ready, remove from the heat and keep whisking (trying not to get air in) to cool in down, because otherwise it can curdle (even if it has cornflour).

I like to add a few knobs of butter to give it more shine and make it even smoother, but that’s just me, not needed, so you choose. When cooler and smooth pour onto the desired ramekins or bowls and leave to room temperature to cool down completely and then onto the fridge (if you cover them with cling film before they are cool, the vapour will condense on the surface, not nice). Ah, since it is fairly thick, give it a few taps over a kitchen towel to get the surface even.

IMG_2874

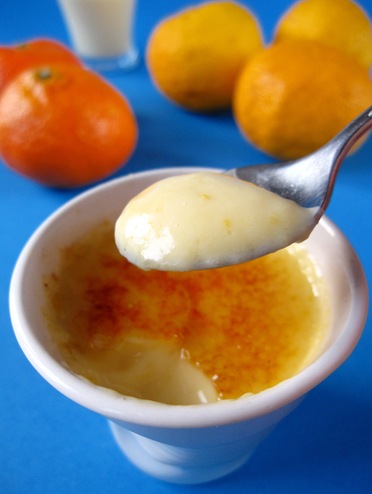
It’s better rested…but we tried ours after 1 hour only! DELICIOUSSSSS!!!! They are soooo tasty…if you can find yuzu, you won’t regret this recipe!

IMG_2882

I almost forgot to tell you about Panforum 2010! I’ve been reading and writing so much about how amazing it was for all of us who were lucky enough to have the chance to go that I feel like all has been said!

It was amazing to put faces to so many people whom I see everyday in El Foro del Pan (an amazing bread forum, in spanish, though english-speakers are welcome) and to share our own breads along with those of professional bakers. The whole day program was really interesting including short courses on specific baking techniques and a round-table discussion from some of the most reknowned bakers in the spanish scene. And last but nevertheless NOT least, Dan lepard was there to illuminate us all, give us advice on all our doubts and talk about the handmade loaf along with incredible stories from his travels and future plans. What can I say…Not to miss Panforum 2011!!  If you want to check out more about it see this link of El foro del pan with some great photos or check out Miriam’s fantastic story on it in her blog The Winter Guest (she’s said it all!…in spanish, though. She always translates her entries but just not this one). Hope those who missed it can make it next year!

continue for recipe...

November 27, 2010

PanForum 2010…Meet Dan Lepard & Xavier Barriga amongst other professional artisan bakers

image

This is an event that you CANNOT miss if you are interested in bread baking. It will be meeting point for professional artisan bakers and home bakers! Javier Marca from both Bak and Madrid Tiene Miga has organised a whole day program (from 11am to 8pm) full of interesting activities!

There will be a roundtable discussion graced with the presence of some of the key actors of the spanish bread baking scene (including professional artisan bakers Xavier Barriga & Anna Bellsolà). Also, home bakers will bring their breads (or doughs to bake there in professional ovens) to be served in a testing session and/or to participate in a contest (both for professional and home bakers)! For those of us with still much to learn, there will be short classes on bread baking techniques as well! During the “Dr. Bread” session you will be able to solve any doubts you may have about baking by professionals. And last but definitely not least, from 6 to 8 Dan Lepard will present his translation of “The Handmade Loaf” with Ibán Yarza (whom you’ll know from his honest blogs “¿Te quedas a cenar?” o “La Memoria del Pan” and from launching the spanish bread forum “El foro del pan”)

Where? In Madrid, Off Limits space (Escuadra, 11), so if you think you might be interested, check out further information in Madrid Tiene Miga and confirm assistance (5€ entrance fee) at panforum@bakmadrid.com. So, will I see you there? It will be worth it, so don’t hesitate, come!!!

continue for recipe...

November 21, 2010

Quinces: from slow poached to “dulce de membrillo”

Copiar (1) de IMG_26832

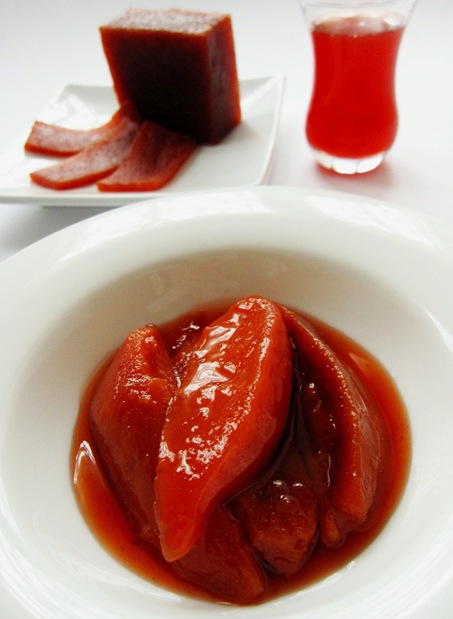
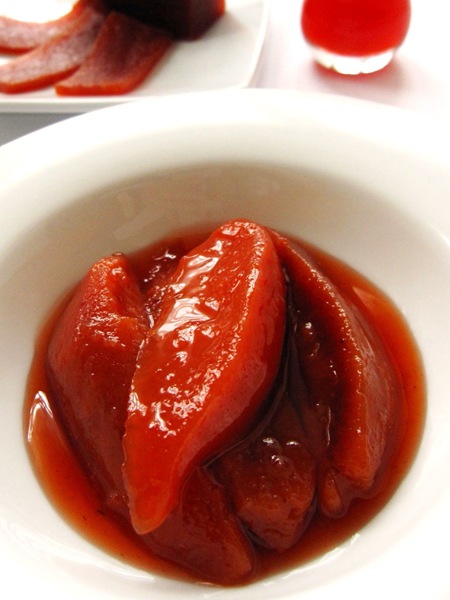
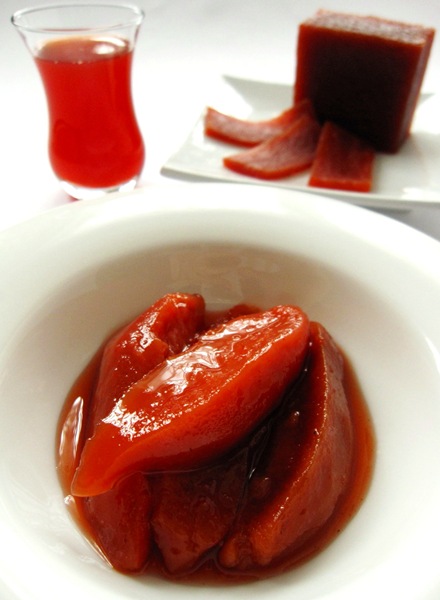
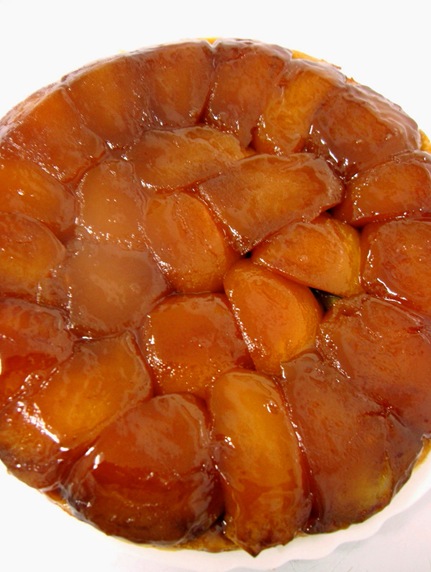
Don’t you find these colours lovely? It’s autumn on a plate!I find these poached quinces so beautiful but most of all comforting! They are delicious on their own, but with a dense greek yoghurt, they are in perfect balance!The creamy yoghurt slightly sweetened with the glossy (I cannot describe the texture of these poached quinces…dense but soft?!) ruby coloured, slightly sour quinces!

I must admit that I was attracted to this way of cooking quinces from the moment I saw them in Haalo’s amazing blog. From her I learned that the slower the poaching the more intense the colour, and after a few tries, it is definately true! I use a tiny bit more sugar and I also prefer to use other spices like cinnamon or a tad of clove to infuse the poaching liquid, rather than vanilla.But like with everything you can adapt this technique to your taste. I would definately recommend trying it, it is excellent…if you are not too concerned about any consumption issues (gar or electric) as it takes about 3 hours to get that lovely colour! I wasn’t too concerned…but Linguini raised my awareness!!So definately next time I make them, I’ll make quite a large batch to keep for a while!!
IMG_2584

Same story for the “dulce de membrillo” if you want such intense colour. There’s many ways to make this, but my preferred one so far is to cook them (skin and all) in water for looong to get a dark amber colour, then blend that puree with a bit less than it’s weight of sugar (I’m not a fan of overly sweet things) and cooking that off slowly until it reaches the texture I like. That texture is not the same for me as it is for Linguini. I like dark, rick membrillo (like the fairly expensive Santa Teresa brand) thinly sliced, as many cheeses  best partner(almost all, except blue). There’s a saying in Spain that goes “uvas y queso saben a beso” (grapes and cheese taste like a kiss) as they are a perfect match. Well, I’d definately agree with La Mambalina and say “membrillo y queso también (meaning also) saben a beso”.

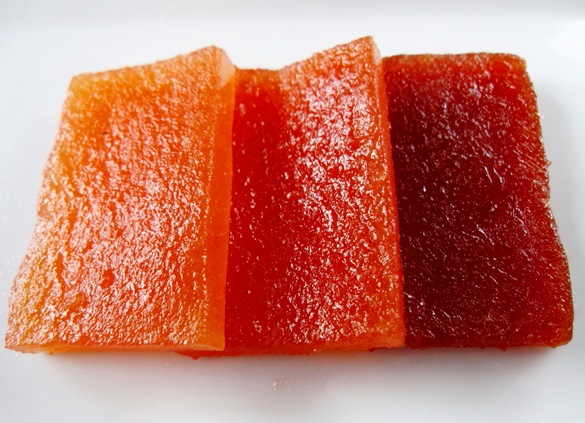
Linguini, on the other hand is used to the usual cheaper commercial ones which texture resembles more a compote rather than a pâte de fruit, as he says for everyday use he prefers this milder softer one thickly sliced. So, after over 4 hours of cooking and it cooling down he said…can you not make it more like the usual ones?!So, I’ve made two more batches to play around with texture and colour…and keep him happy!Next time, I’ll make him happy trying to save up money using a pressure cooker for this, to see how it works!

IMG_2770

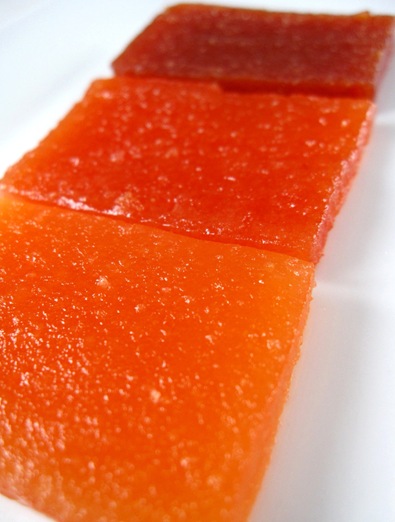
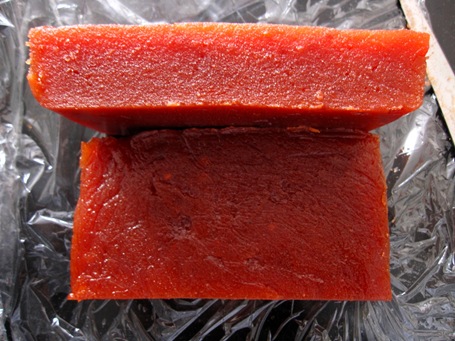
You can see my dark first batch this season on the far end…rich, thick, more caramelised, and the more orangy colour on the front has a more gelatinised compote texture. No surprise, as quince is very rich in pectin (one of the few pâte de fruits that does not require added pectin) that’s why I’ve kept the cooking liquid…more like a gelatin (on the turkish tea glass) to use to impart colour and texture to other jams as Christine Ferber’s apple pectin! At least nothing is wasted!!!;)

Slow poached quince and “dulce de membrillo”

For the slow poached quince:

800g of quince

200g of sugar (1/4 of the weight of quince)

water to cover

a drizzle of lemon juice

spices to taste (I used a stick of cinnamon and 1 clove, but you may prefer 1/2 a vanilla bean, seeds scraped out)

For the dulce de membrillo:

~1 kg quince

~800g of sugar (The usual ration is 1:1 but I prefer to use less sugar)

drizzle of lemon juice


To slow poach the quinces, simply peel the quinces, and cut in fourths or smaller and core. Be sure you remove the seed and the white part around them which holds really hard little pellets (with the same colour of the flesh, so you must feel them).

If you are quick doing this, there’s no need to place them on a water and lemon juice bath as you go and place them directly with the sugar and water to cover.

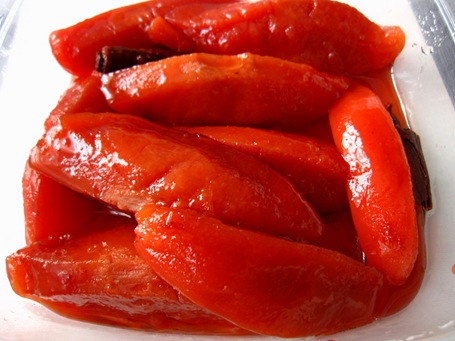
Bring to the boil and bring down the heat to simmer very slowly, slightly covered. Like Haalo says, the lower the boil and longer, the darker the colour. You might think 2 hours is enough for you, but I left it for about 3!And this is how they looked…

IMG_2661

And on a plate:

IMG_2683

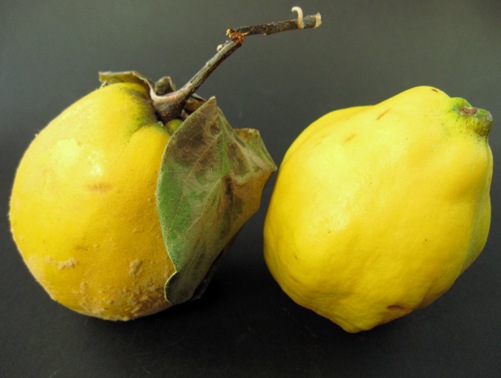
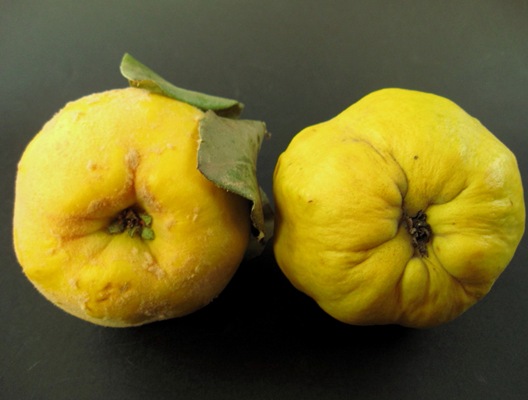
Now, the “dulce de membrillo”… Wash the membrillos to remove the soft velvet around it. If you notice the one on the left, fresher has it still over it, whereas the other one, which is not as fresh is almost waxy in appearance (this is how you’ll most often find the quince).

IMG_2582

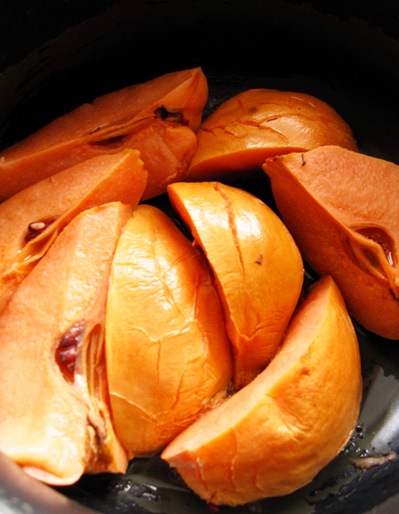
Then, quarter without peeling or coring and place in boiling water. As soon as it recovers the boil, lower to a soft simmer…

Now, to get a really intense colour, I cook it for at least 2 hours very slowly, but really only half an hour is needed to get them soft and then blend them with the sugar. So, if you are not so concerned about this rich ruby colour, you can just cook until fork tender. But if you want to get a dark colour, cook for longer. After 2 long hours, this is what they’ll look like (the photo is terrible, it was night time and couldn’t get any better!).

IMG_2664

Ah, be sure to strain and keep the cooking liquid, that’s the reason for cooking them with seeds and skin (as they have more pectin) Well, and also because I find it easier to just quarter than peel and core the hard quinces…With that gelatin, you can thicken naturally other jams (which are already dark) or give colour and add pectin to lighter looking ones. Or…if you add sugar (same weight of the juice or a bit less), just use it as a quince gelée! If not thick enough, you can reduce to get the texture you want.

Now, with the quinces, let cool enough to handle and remove the skin, which peels off easily and core, making sure you remove the hard little pellets underneath the dark seeds, otherwise they’ll end up in the pureed quince and are really nasty to find!

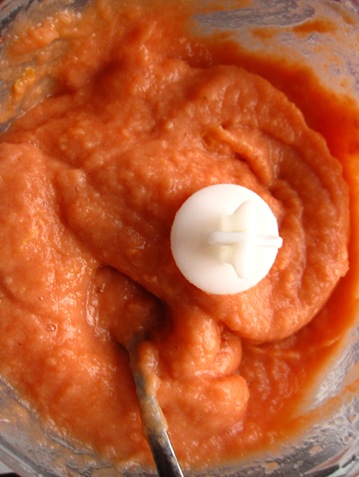
Blend with the sugar (1:1 or a little less sugar if you want a slight touch of sourness still in the end) and a drizzle of lemon juice.

IMG_2667

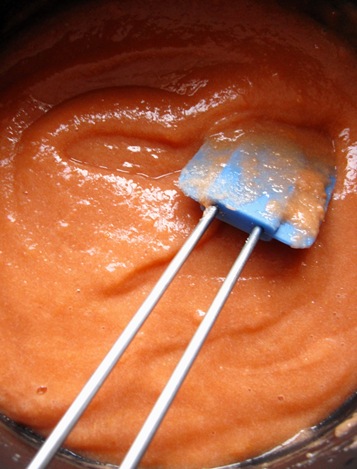
and pour back into the casserole to cook it down.

IMG_2670

You should at least cook it until when you stir with the spatula you can see the bottom of the casserole. For the light coloured one I think I left it for a bit more than half an hour, for the other one, about one hour, and the dark one 2 hours over low heat!

It is very recommended to use a splatter shield to avoid burns! I used a new non-stick super-thick amazing casserole I bought, and it was amazing. But if not, it is recommended to use a high pan and the shield, as the puree when it bubbles can splatter and it is almost like caramel! So, be warned, just in case.

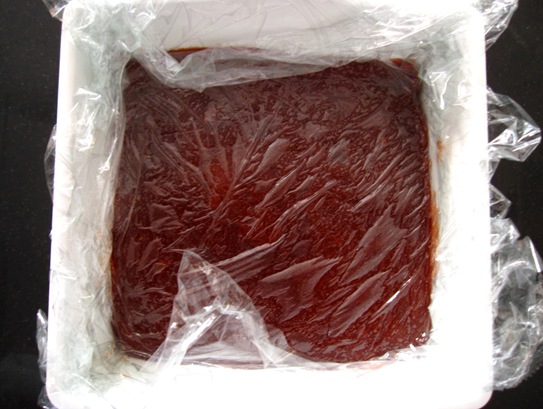
When it is to your liking of consistency (you can try by cooling a teaspoon in the freezer to see if it sets well). Pour onto the mould you like (I used a 15x15cm square mould, but a plumcake tin works well) completely covered with cling film to unmould easily and cover with some extra cling film to press down and even out the surface.

IMG_2672

After it has set, you can easily remove it from the cling film and wrap into as many pieces you like.

IMG_2675

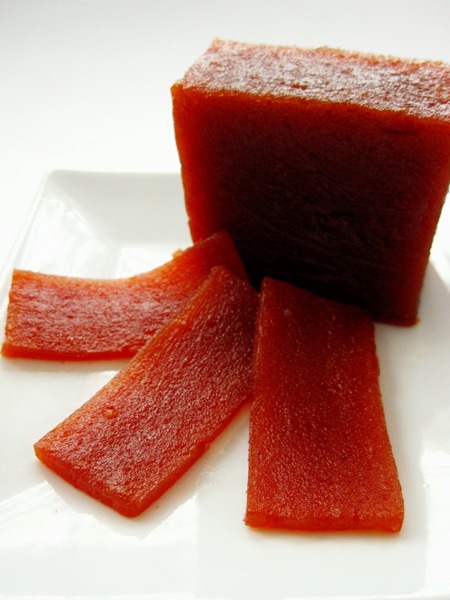
Here’s it sliced thinly…which tastes like heaven with cheese!

IMG_2682 

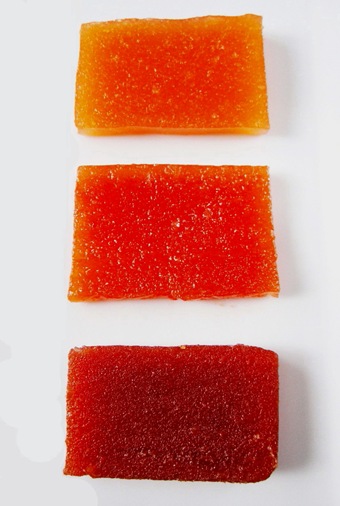
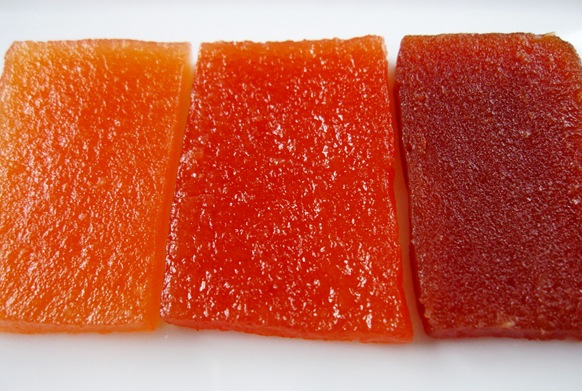
And the 3 different “dulces de membrillo”. Notice the different colours, each with a different texture.

IMG_2758irfan

Here are two closer looks on the texture:

IMG_2771 IMG_2777

I hope you find in these two recipes at least one way to enjoy seasonal quince!

IMG_2676

continue for recipe...

November 7, 2010

Tasty butternut squash, ginger & coconut soup

IMG_2701

I love this combination of flavours…Sweet & creamy butternut squash, the boost of the fresh ginger, the subtle coconut cream with the light aroma of fresh lemongrass, all seasoned up with a touch of revitalising lime juice! Perfect, if I might say! I haven’t tried with other pumpkins, but to me butternut squash is special. I love it’s colour, but it’s its flavour what differs it from other squash family members! I love it roasted, sautéed, puréed, raw…Everyway you can think of!

This is one of those super comforting winter dishes, that really warms you up in a cool day. Though, it can also be served cold in warmer days! Plus it looks great in small shot glasses for a fancy cocktail! It looks good, and tastes even better…be it creamy & warm or more diluted in it’s cold version (as the lime and coriander freshen it up a lot!). So, it’s versatility makes it suit many different occasions!

This dish also reminds me that Linguini used to get sick at winter time…until he met me!:) and I introduced him to ginger (or so he says!). I cook with ginger quite a lot, so he associates his boosted immune system to this change in his diet! I’ve never really paid much attention to ingredients medicinal properties (that will change as I get older, I am sure), but if you search for ginger…it seems to be good for almost everything!! So…if you are not convinced yet: taste this creamy soup for its incredible flavour and texture and because it is good for you!

Butternut squash, ginger & coconut creamy soup

(enough for about 5 people)

1 small butternut squash (mine was about 800g whole, about 600g for the soup)

1 large onion

1 piece of fresh ginger, about 15g (or to taste)

1 potato (optional, looses colour but makes it a bit creamier)

2 small fresh lemongrass stalks

15g neutral oil+20g butter, or all oil to fry the onion

1 can of coconut milk (400g)

water or clear vegetable stock, to reach desired texture

pinch of salt

some freshly ground pepper

fresh lime juice, to taste (I used half a lime)

fresh coriander leaves, to serve

This soup is super easy to put together, I just took extra time, because I separated a bit of the butternut squash to sautée it at the end to serve on top and contrast with the mellowed down hue of the soup. Also, because to use up the seeds I washed them up, dried, and slow-roasted in the oven. But if you are not going to bother with either of those two “accesories” it is very simple to make!

So, let’s begin…chop up the onion and ginger (finely, better) and place with the fats (butter &/or a mild-flavoured oil) and some salt over low heat to slowly fry them. They shouldn’t brown, just get really soft. You can add the bruised lemongrass stalks here, or leave them to infuse with the cream at the end for a fresher taste.

IMG_2646 

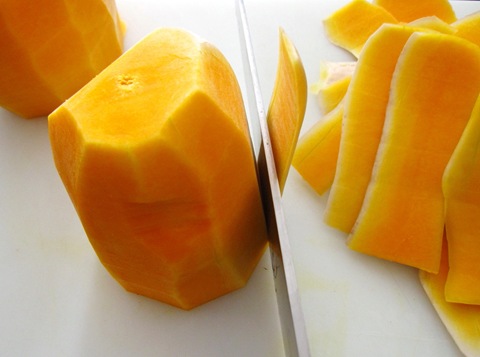
Meanwhile peel the butternut squash, cutting off the skin. If you are going to sauté some to serve, reserve it now. I ended up adding only about 600g to the soup, after peeling and leaving some for later.

 IMG_2644

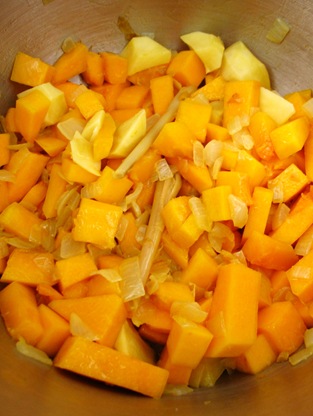
Add the chopped butternut squash and slow fry a bit until it releases it’s flavour and begins to soften, then add the chopped potato.

IMG_2647

Cover with the coconut milk and a little water if needed to cover it completely (and one of the lemongrass stalks if you prefer that fresher taste), season a bit and cook until both the potato and butternut squash are butter soft! Then, remove the lemongrass stalks and blend until smooth and add water until it gets the consistency you desire. I like it quite creamy, but add more water to reach how you like it!

Now season it to taste and add the splash of lime juice which is what gives it character (you’ll see how drastically the flavour changes). Even if you don’t like the sourness of the lime, add a tiny bit, as it equilibrates this dish, believe me.

IMG_2651

That’s it! Just a note to make if you plan on freezing this. It’s ok to freeze it, but don’t freak out if it looks split after defrosting, as the coconut cream separates…Just give it a whiz with a blender, adding a bit extra water if needed, and you are back to the beginning!

For the seeds, wash them up to remove the bits and pieces of flesh, dry them or leave them to dry in a colander and season with some oil, salt and pepper (even some dried ginger or lime rind, if you like. This time I just did plain salt & pepper for crunchiness and seasoned the sautéed butternut squash) and roast in a aproximately 110ºC preheated oven for about an hour until you feel they are crunchy and lightly toasted. Sorry, no photo as my oven is STILL not working and did this over my sister-in-law’s!

For the sautéed, as simple as cut the butternut squash in small squares and stir-fry with little oil over medium heat until it gets a bit soft. Season to taste with some salt and freshly ground pepper. I also added a drizzle of lime juice and a bit of finely grated rind, but that’s up to you.

Imagen1

When ready to serve, warm everything up, serve with the seeds and sautéed & seasoned squares over and drizzle a bit of oil and….Enjoy!!

IMG_2694

continue for recipe...

November 1, 2010

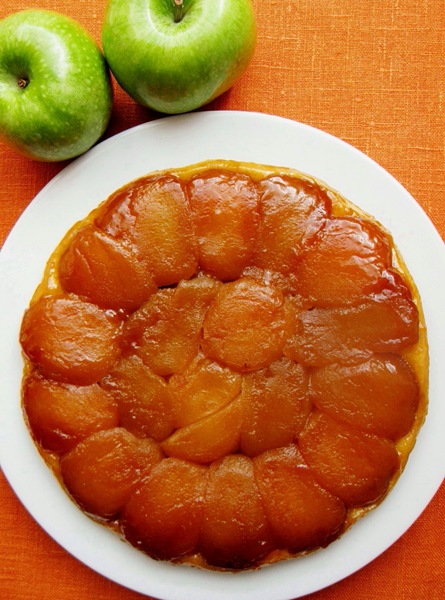
Tan ta ta tan…I present you Tarte Tatin

IMG_2399bis

Few desserts I find as impressive as the transformation of some simple apples into this beautifully caramelised tart. The looks are already appealing, but the taste…is even better!It’s like a soft apple toffee (sour apple to me, I’m not a fan of overly sweet things) melting away in your mouth with the texture of a comforting compote…For those of you who haven’t experimented it, I guess you’ll just have to give it a try!

It really isn’t difficult to make, it’s just about getting the heat and timing right, so the apples get an even caramel colour as they cook.You can do it in the oven, you can do it in the stove (if you get the right pan, that is, for if it isn’t a thick bottomed pan to spread the heat evenly to avoid hot spots, you won’t get that luscious even look!) or you can use both. Also, you can do any size you like, from larger tarts to individual ones…so what are you waiting for!?;)

IMG_2372

Also, choose the apple type according to your preference, as long as they withstand cooking, not like spanish reinetas that transform into a puréed compote (I already tried! believe me, they don’t work). I love sour granny smith apples the best, apparently in France the traditional apple to use is Reine des reinettes (I’ve read it’s the same as king of the pippings, in case you can find it by that name) a slightly tart apple, which I haven’t managed to find here. Otherwise golden is commonly used by most pâtisseries, but I don’t particularly like it here, “trop sucré” for me…it doesn’t equilibrate all that sugar and butter! If using it be generous with the lemon juice, I find it improves greatly!

IMG_24082

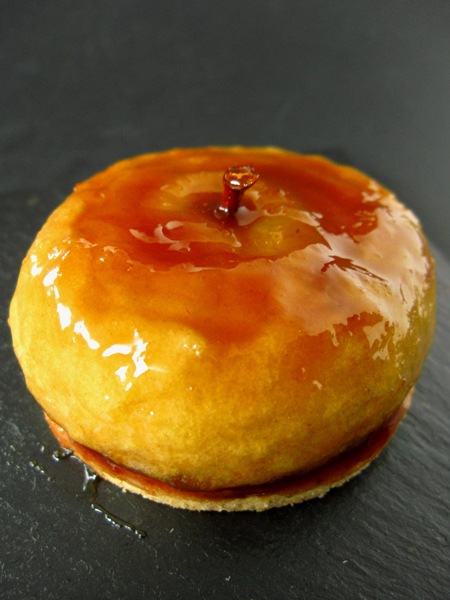
I was inspired by a wonderful photo I saw some time ago by Meg Zimbeck about an individual tarte tatin that was more like a little gem than an edible tart, created by Fabrice Le Bourdat for his pâtisserie Blé Sucré. Amazing isn’t it? Well, I’ve made a really simplified version simply caramelising the cored apple halves and already they make a great individual tart! If I had roundish moulds that size, they’d look more even! (and considering my oven has been broken for a week now and I can only rely on my stove, it’s the closest approach I’ve got so far!Next time I think I’ll leave the stem out and then replace it back after the caramelisation is complete as the pectin will hold it in place!

IMG_2511yes

It’s almost as simple as making the larger tart itself, and isn’t it cute? Anyway, read on for the recipes…You won’t regret trying it!

Tarte tatin

(for a 24 cm pan)

For the filling:

8 granny smith apples, that is about 1kg 750g (or your apple of choice that withstands cooking:golden,pink lady, fuji etc.)

150g granulated sugar (the amount of sugar can range from 125g up to 200g depends on how sour you like it. If you choose an apple that is not as sour, reduce the amount accordingly)

90g butter (it can be salted as it enhances flavour)(use 60g for a 24 cm pan)

a drizzle of lemon juice

optional: a little piece of vanilla bean open to release the seeds or some cinnamon ( I don’t use either as I like the pure sour apple toffee flavour!)

For the pâte sablée/brisée, you’ll have left over:

~200g of flour

100g butter, cold

50g of sugar

pinch of salt

~1 L egg

Let’s begin with the filling…You can prepare this tart all in one go, or over two days. I often do it over two days, I prepare the apple part first, leave in in the fridge until the next day and over the cold filling place the rested pâte brisée. But it is not necessary, you can do it all straight with equally good results. The main difference? organisation! If you plan to do it over two days, you prepare the filling first, if not, prepare the pâte first, so it rests in the fridge as you prepare the apples. As simple as that! So, in this case I’ll start with the apples, but you can do it the other way around!

First decide which mould or pan you’ll be using. You can make the caramel in a pan, then pour it in a mould and place the apples on top to cook in the oven, or do it straight in a pan that can go in the oven (that’s what I always prefer to do unless doing individual ramekins).

To make the caramel, you can do it adding a tbsp of water and a drop of lemon to avoid it getting grainy (and placing it over higher heat at first, which also helps prevent that from happening, also make sure the pan is clean from fat residues) or do it dry, without any water that is,  but for this you need a thick bottom pan to avoid hot spots or some parts will melt and caramelise (and eventually burn) while others don’t. So, if using this method, which for small quantities of sugar is my preferred one, place it over very moderate heat until it starts to melt in some areas, then swirl the sugar around a bit for homogenous melting until it’s all a golden amber colour.

Imagen1

Meanwhile peel the apples, cut them in half and then fourths and core cutting the angle off. Drizzle with some lemon juice if the apples aren’t sour…This is usually done to avoid browning, but here it doesn’t really matter, as they’ll be used immediately and they’ll brown from caramelisation anyway! So I just do it to sour the sweeter apple varieties.

When the sugar is caramelised add the diced butter (or in small pieces) until melted and take off the heat (you can even do this step off the heat).

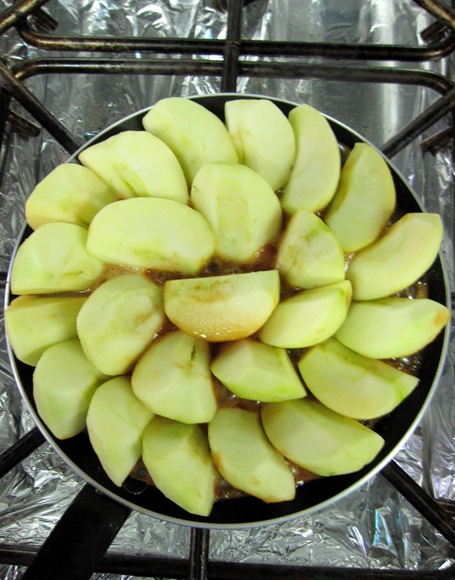
Then, arrange the fourths of apple over the caramel, start with the outer circle placing the rounded side down and one slightly over the other. It will look like it’s a lot, but the apples will cook down a lot, and this is one of the best ways to get a nice pattern and that the apple pieces are tight against each other and so they don’t fall apart when turned around. So, after the outer circle is done, fill the rest with some more fourths. If it looks like they wont fit, place the whole on the heat (medium-low) until they soften slightly, to fit the left over fourths in. They will fit, believe me, later on you can press them down to make them fit better!

IMG_2355 

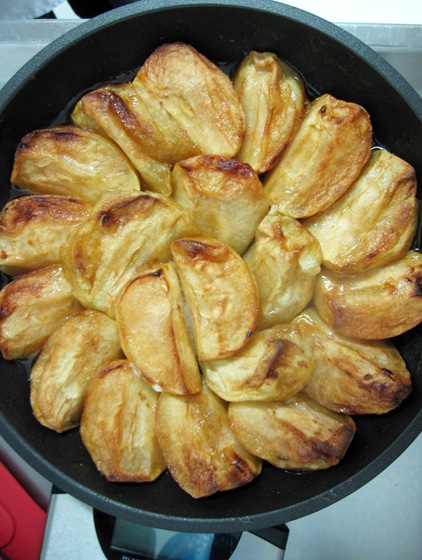
Now you can either continue cooking and caramelising on the stove or take the pan to the oven (preheated to 175ºC or slightly lower, 160ºC). If you take it to the oven, at around 175ºC they’ll take about 40 minutes, at the lower temperature, about an hour. BUT…check anyway! You want the colour of the bottom of the apples (the part touching the pan) to be golden, but not too dark, as they’ll have to cook at least 20 minutes longer with the sweet dough! So, if you leave it the colour you want, they might get too dark after those extra minutes!

As the apples cook, you can take them out from time to time to baste them with a pastry brush, so the tops don’t dry too much (it’s better not to be tempted to cover them even if you see they colour on top, that’s normal…remember that will be the bottom side and won’t show, otherwise the moisture won’t escape and the caramel will get wetter instead of cooking down).

Note on 27/3/12: I recently discovered a very convenient way to caramelise the apples in Bernard’s blog “La Cuisine de Bernard”. I tried it this weekend, and it is definately worth a look! Makes life easier when trying to fit so many apples in the pan/mould!

After 40 minutes, it will look something like this…

IMG_2368 

If you are doing this with the straight, one day method, take it out and rest it for at least 10 minutes to stop bubbling and cool slightly. Meanwhile stretch out your dough and cut it (2 cm larger than the diameter of the filling, so it wraps around them and the sides can be folded it to hold the apples). Otherwise, let cool down and place in the fridge until the next day and prepare the dough.

Very easy to make, just remember to NOT overwork the dough to avoid gluten development and get a crumbly tart base.

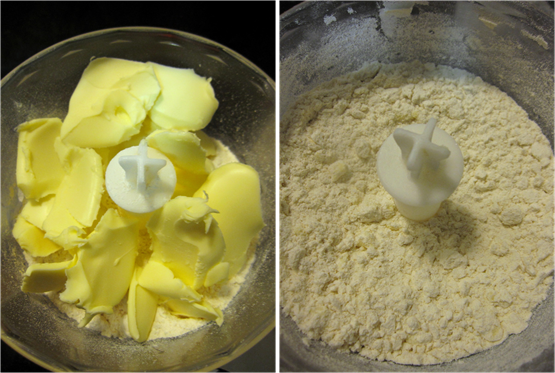
If using a food processor it takes less than 5 minutes, without it little more… With the processor, add the sifted flour and the COLD butter diced and press a few times to integrate the butter into the flour until they resemble coarse breadcrumbs.

Imagen2

If doing this by hand, I find the best way to do it it to coarsely grate the very cold butter (you can even place it in the freezer a while before) over the sifted flour and then lightly rub it together. Important to note that how much the butter is crumbled directly affects the resulting dough. If you want it to resemble a puff pastry, then leave pea-size pieces of butter without integrating so while cooking, these will melt and separate layers of dough, otherwise blend both ingredients more thoroughly!

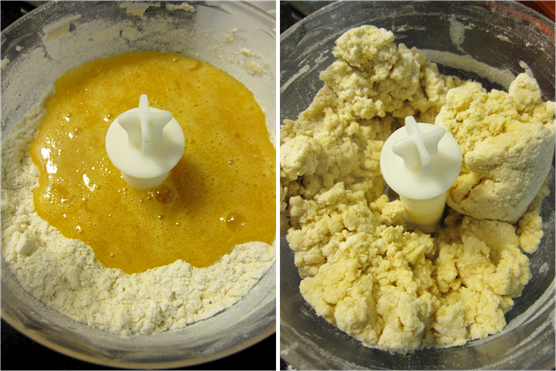
Then, just lightly beat (mix, not incorporating air) the egg with the sugar and a pinch of salt) and incorporate that until it comes together. If it doesn’t add some iced water (a little at a time!). The less moisture, the crumblier, though the harder to work with when stretching!

Imagen3

By hand it’s the same, mix quickly the egg+sugar into the flour+butter without working too much, until it just comes together. After the rest, it will hydrate completely. Shape into a loose ball, wrap into cling film and flatten lightly and rest, either at least 30 minutes or until the next day.

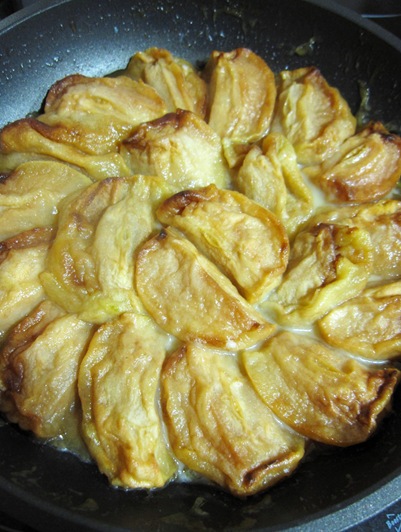
Next day, the apples will look set. A note to make is that if you use this method, which other than doing it for whichever convenience reasons you may have, it’s done to improve the texture of the sweet dough as it cooks from cold; the apples can be cooked to a deeper amber colour than with the straight method as this second cooking they’ll be placed cold and thus will take longer to caramelise than with the caramel already melted and warm! This is how the apples may look…

IMG_2383

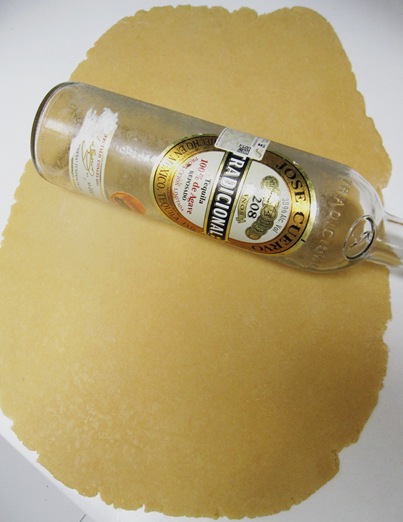
Stretch the dough into a bit less than half cm and cut off a piece about 2 cm larger than the diameter of the apples, like I mentioned before. Ehem, since my oven broke, I had to take both apples and dough to my parents house to finish it off and since they didn’t have a rolling pin, I had to use what was at hand!

IMG_2385

When stretching, make sure you flour the bottom side of the dough, or after it is perfectly stretched you may find it is completely stuck on the work surface!

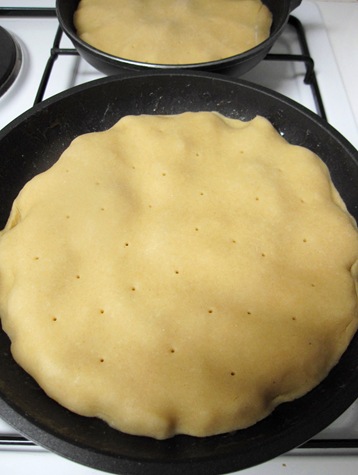
Place the dough over the apples making sure you tuck in the sides to wrap the them.

Then pierce the dough so it doesn’t puff up…

IMG_2390

With the dough, I had enough for two tarts and still left for cookies filled with jam!

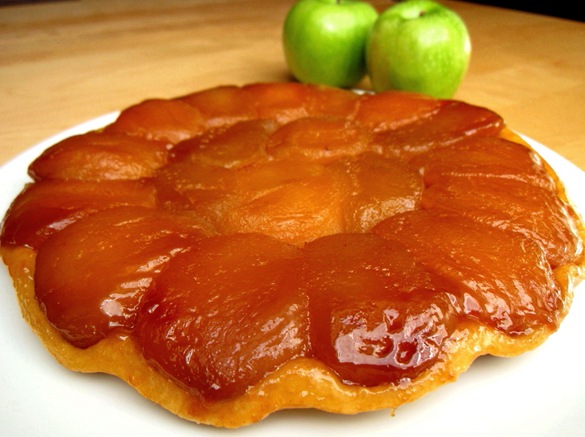
Place in preheated oven (180ºC) for about 20 minutes, until golden and remove from the heat. Let cool slightly for about 5 minutes, so the moisture left is reabsorbed by the apples and you don’t spill it as you turn it. Also, it makes the apple hold better together once turned, and…turn onto a dish!! Ah, before you turn, shake or swirl slightly the pan, to make sure it moves around freely, otherwise indication that it is stuck and won’t turn out ok, you may need to warm it up over the stove lightly (unless it means it has burned, I doubt it if you’ve checked your apples)

IMG_2410

And that’s it! Ready to serve! Best enjoyed with crème fraîche or even sour cream rather than the often used vanilla ice-cream, but it’s all up to you now! If it cools, it’s better to place it a few minutes in a warmish oven to get all it’s shine back and because it tastes better slightly warm, one of the reasons why cold crème fraîche or ice-cream make a great match!

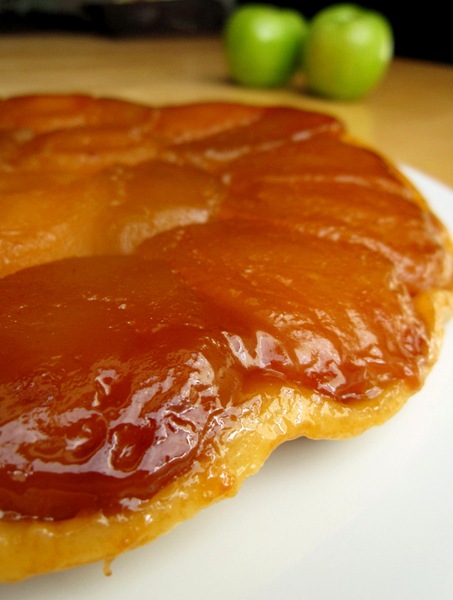
Yummy close up, again with the only props at my parent’s, which I’d taken along: two sad granny apples!:)

IMG_2414

And I didn’t get time to get a proper photo of a slice…the family cannot wait! So a quick shot…

IMG_6153

Now, for the individual half-apple tarts! As I’ve said before, If I had roundish apple-sized moulds, I’d use that, but since I don’t I had to manage with a pan that would fit the amount of apple halves I was making, in this case 4…

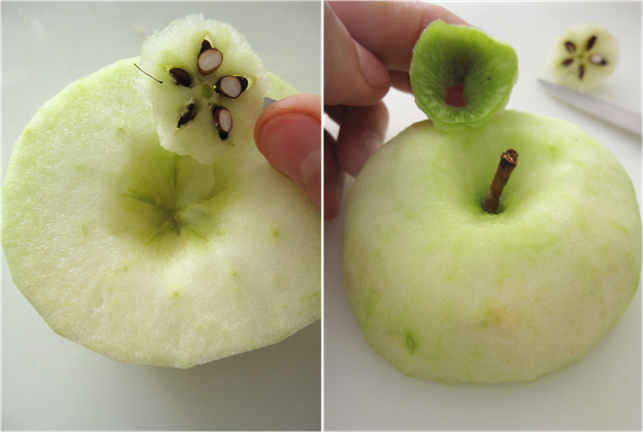
First peel the apples, cut in half widthwise and remove the inner seeds and the skin around the stem (this is what I did, next time…I’d remove the stem and keep it fresh to stick back after caramelisation)

Imagen4

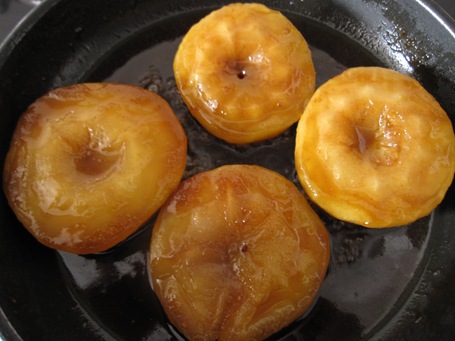
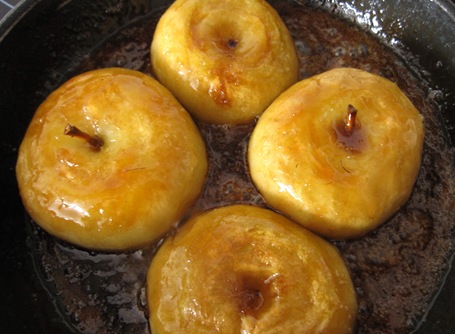
Make a caramel the same way as for the large tart (but for two apples, I used 50g sugar and 20g butter). Place the apples rounded side down at first and cook them until they get a light caramel colour, then turn them. Since my oven was broken I did it all in the stove basting often, but for sure it would be better in the oven, as the heat is more even and they collapse less…

IMG_2468

Here turned…

IMG_2464 

Remove them onto a plate the right way around, after basting them a little more to create a shiny pectin layer.

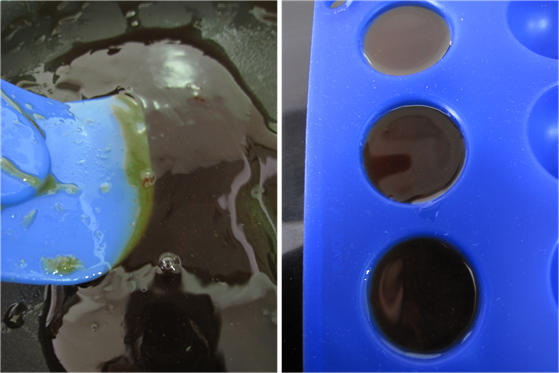
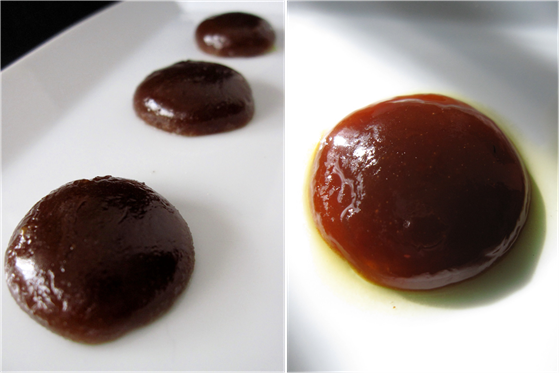
To show you this is pure pectin, I placed the left over liquid on moulds to see how they’d set

Imagen5

Here they are unmolded:

Imagen6

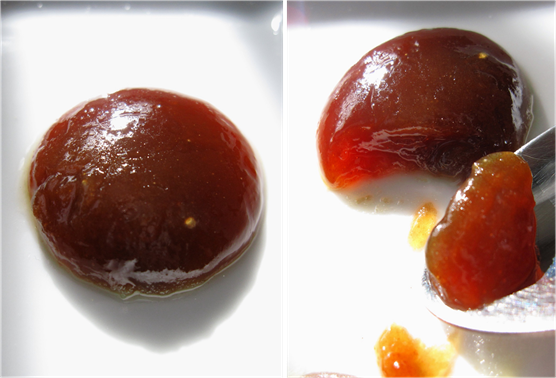
I had to get it to the sun, to show the colour…

Imagen7

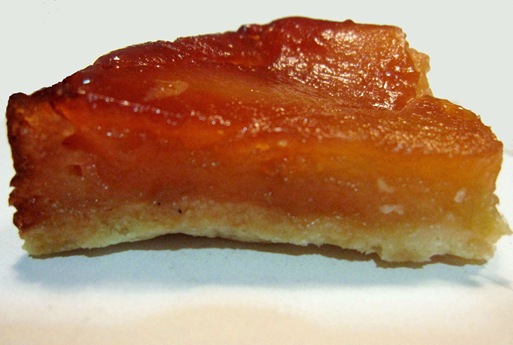
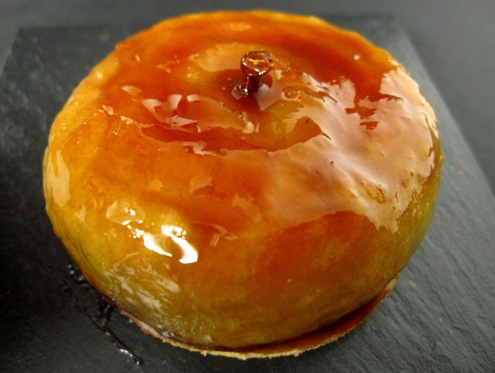
And of course the individual tarte tatin, over a sweet dough baked separately ( I think the blé sucré ones are over thicker sablé bretons, if you can tell from this photo

IMG_2514yes

The next to try is Philippe Conticini’s amazing version of very finely layered apple rounds that together build up the same thickness of a traditional tart, slowly caramelised in a mould and then unmolded over a inverse puff pastry with hazelnut praline streusel…sublime!I still have to try it, but I don’t know if there’s a better tatin…I think they are all similarly incredible!Bon ap’!!!

continue for recipe...