October 14, 2011

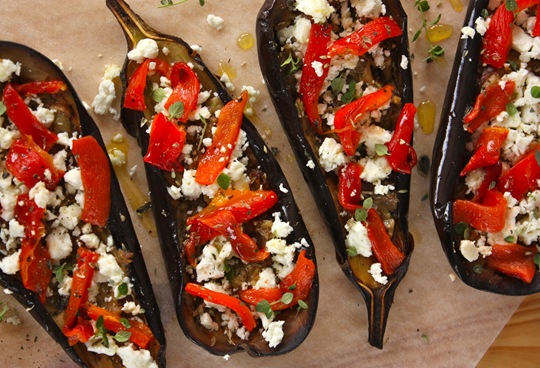
Greek roasted aubergine and feta salad

 IMG_0844

Over 10 years ago I spent some time in Greece at a close friend’s house. At that time I was pursuing a completely different career, far from the culinary world. But already one of the things that fascinated me most during my stay was watching my friend’s mom cook. She was a brilliant cook, from her I tried (and did my best at learning) the best spanakopita I have ever had, phyllo also from scratch! amongst other things. The family had a restaurant and one of the things that was love at first bite was “melintzanosalata”, the Greek take at a dip like baba ganoush. It literally means aubergine salad and even more than on baba ganoush (or muttabal)  it’s focus is further on the aubergine, the smoked flavour of the aubergine in particular. That was the first time I ever encountered that “smoky” taste, I didn’t even know how they achieved it, but it blew me away.

Since, I am addicted to that flavour, which they later showed me it was imparted by roasting the whole aubergines over coals (I’ve achieved it by roasting it over flames, see the photo below). Anyhow, the dip was simply that smoky aubergine flesh, a tiny bit of garlic, lemon juice, a tiny amount of olive oil and after analyzing the dip day after day biting into tiny white speckles scattered in the creamy dip, what I figured to be feta cheese (here is a simpler version without the feta); all barely adorned with chopped fresh parsley. Aside from that dish, my friend’s mom also made a dish she named “melintzanosalata” by roasting the aubergines, opening them in half and turning the flesh into a paste quickly grating with a fork and mixing the same ingredients over it for a more appealing presentation served with red peppers roasted at the same time. It was heavenly!

IMG_6229

Since this week I’ve been compulsively testing a few recipes that just don’t get where I want them to be, I present you that simple yet super tasty version of that melintzanosalata. You’ll find that not much explanation is needed as it’s a very simple dish which just involves roasting (whole or halved) seasoning to taste with salt, lemon juice and olive oil, that bit of garlic and scattered feta and some fresh herbs. Just decide if you’d rather roast whole for smoky notes (and less than 10 minutes once the fire is going!) or halved in the oven to not even waste the skin!

IMG_0850

Roasted aubergine and feta salad

2 aubergines

1 red pepper

salt & pepper to taste

1 small clove of garlic

40g olive oil plus extra to finish

drizzle of lemon juice

about 50g greek feta cheese (more or less to taste)

fresh parsley or oregano (I also used some lemon thyme)

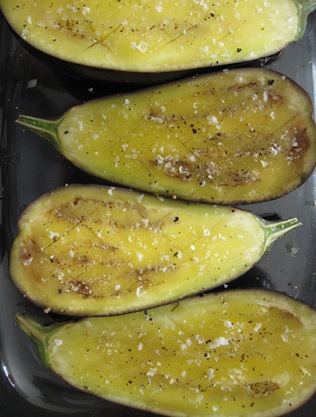
If you are going to roast the aubergines in the oven, turn the heat on to about 220ºC. It’s pretty high so the aubergines roast rather than stew). Halve them, make 3 or 4 parallel cuts with a knife across the flesh (not reaching the skin) and repeat in the other direction to form a diamond pattern.

Brush the 40g of oil amongst all halves. It’s generous so that the aubergine cooks to a meltingly soft texture, without the oil it dries up and feels spongy. Then, season with some salt and pepper (just take into account that fetta is fairly salty, so don’t be overly generous!)

IMG_6561

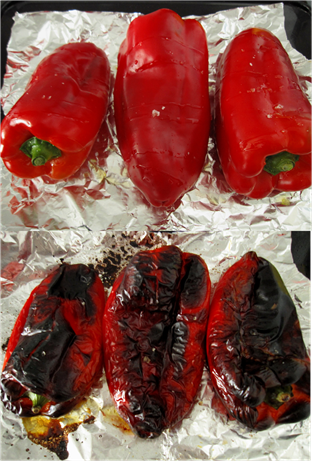
Roast with the pepper on the side over some foil to avoid dirtying the oven. I made more peppers for other dishes…

Imagen1

Roast the peppers until blackened on the outside or very blistered so it get’s buttery soft inside and very flavourful.

Roast the aubergines for about 25-30 minutes or until nicely golden and soft (sorry I forgot to take a shot!)

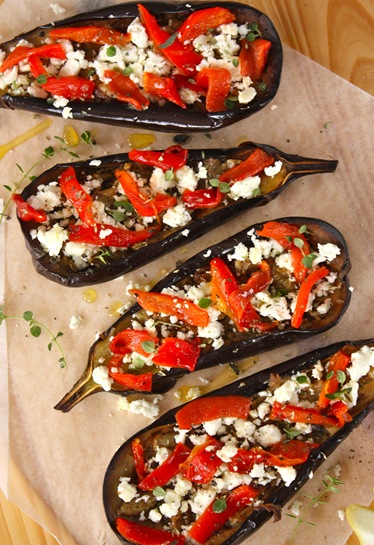
Serve on a platter, board or dish (or even on the baking dish if it’s nice looking!) grate the tops with the tips of a fork and taste to make sure it isn’t bland, in which case add a bit more salt…then will come the feta!

Finely grate a garlic with a microplane or pound well to a paste (otherwise you’ll get chunks that are not nice to find) and distribute amongst all halves.

Drizzle a bit of lemon juice, scatter the feta over, the peeled and chopped pepper and herbs of choice (as you know I like coriander a lot…well, here it goes well too, just a different flavour, not so mediterranean but still good). Drizzle with olive oil and serve!

If you prefer it cool, you can roast the aubergines a day ahead and then just do all the seasoning and scattering when you are ready to serve. Easy, simple, quick and tasty!

IMG_0852

You can eat it all up with fork and knife…you’ll be just left with the stems of the aubergines!

IMG_6566

continue for recipe...

October 4, 2011

Late end of summer natural leaven pizzas

IMG_0672

It’s been a while since I last wrote. Since the end of summer I felt like everything was on an uphill road and as I’ve had a difficult time picking up the pace. I needed some time to disappear into my shell (I wonder if that has to do with the fact that I’m a cancer) to see things from a different perspective. I’m not there yet, but beginning to see the light, so it’s about time I get out and back into real life.

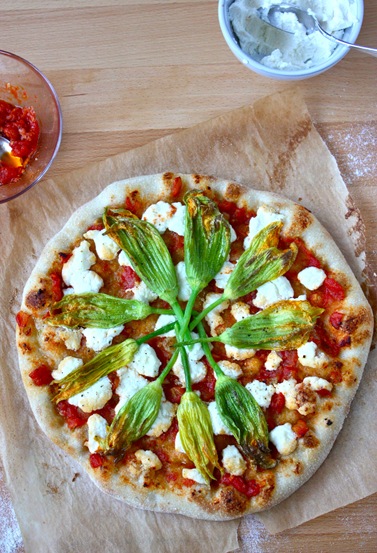
I have been cooking quite a bit, so I have some stories I wanted to share but had been put on hold. Like these end of summer pizzas, made with butternut squash and courgette blossoms and cherry vine tomatoes from our orchard (the only ones that made it, actually!). There’s an incredible sense of satisfaction and being rooted that comes from growing your own food; that paired with a making your natural leaven dough makes the result the ultimate comfort food for me. This is what these two pizzas are, all ingredients home-made or home-grown, even the ricotta, which rise this humble dish to the ultimate comfort food! So appreciated when that feeling is a need.

IMG_9685

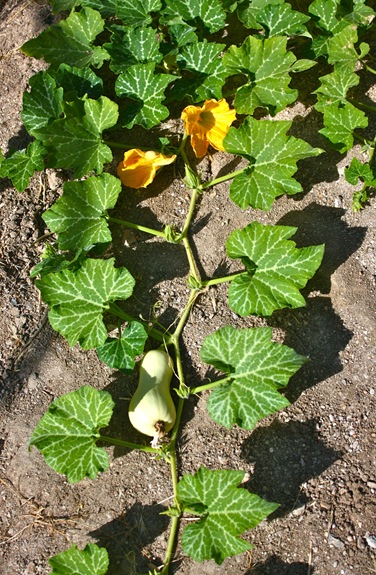
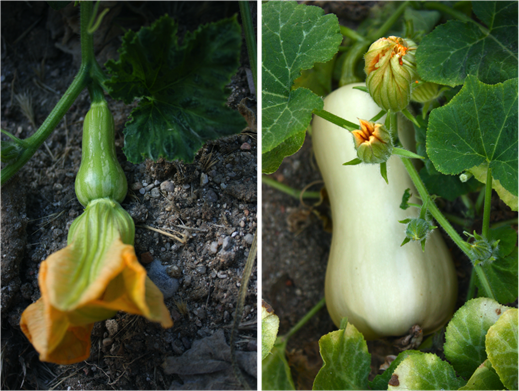
I remember how I saved a few seeds from a butternut squash, sweet as honey and full of flavour that I bought last year that. This year Linguini planted them and though so far we’ve only picked up 4 squashes, I was amazed by the amount of flowers it produced! The plant grows spectacularly fast and if you can tell from the photo at each intersection a flower grows. So, each morning I visited the orchard, the ground appeared flecked with yellow spots from the fully blossomed ones that very day. It was incredible! And this is still going since June, so if you are after the blossoms, this plant is well worth it if you have some space.

butternut squash

For the pizza dough, after a try at a few different recipes, I’ve so far stuck with QJones recipe which he posted in “Madrid Tiene Miga”, but of course you can use any pizza dough recipe you like. I just liked the sweet touch from the fine semolina, the perfect slightly chewy crumb texture but crispy crust of this one made without added yeast but from a fresh very mildly sour leaven (that’s why I avoid using the word sourdough in this case, because it’s not sour!). I made a recipe for 250g of flour, which was enough for 2 medium pizzas.

I made the “unorthodox” ricotta (in between ricotta and mascarpone) a day earlier using Smitten Kitchen’s recipe, which I already mentioned in this post (aha, I just realised I even showed a picture of the first pizzas I tried!).

Late end of summer pizzas

For the chunky confit tomato sauce:

about 200g of fresh tomatoes

2-3 garlic cloves

2 tbsp of extra virgin olive oil

Also:

200g-250g of ricotta cheese 

freshly ground black pepper

8-10 courgette and/or squash blossoms

extra drizzle of olive oil

optional: some grated parmesan & some grated lemon rind (for the blossom pizza)

about 200g of cherry tomatoes

ideally: some fresh basil or oregano to taste (I had to do with dried oregano!)

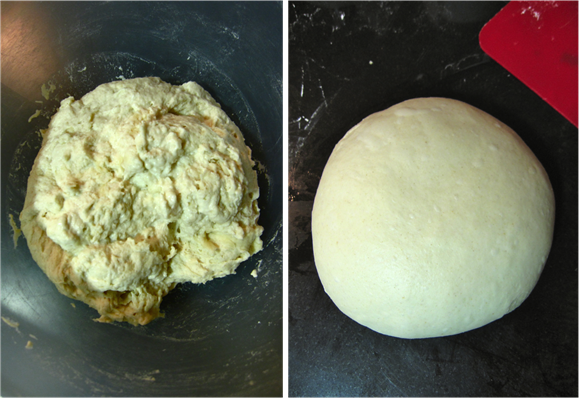
Make your favourite pizza dough or buy a pizza base you like…Here’s the velvety texture of the dough, after an initial rest period without salt added (autolysis) and light kneading. Isn’t it beautiful!Then, it was left to almost double (bulk fermentation) and then, taking care to avoid degassing much, divided into 2, preshaped and then shaped into boules and left to proof a bit for about 30 minutes or retarded in the fridge until ready to use and then brought to room temperature before stretching.

pizza dough

If you do make the pizza dough yourself following any other recipe I do have a few recommendations:

1)I think much of the success is about using the right flours (or it has been for me), I find it best not too use a flour that is too strong unless you like a really chewy crumb!

2)if you like neapolitan style pizza, with some  cornicione and those burst slightly charred bubles, take into account that the more hydrated the dough, the more holes in the structure, so make a dough as hydrated as you can handle to shape comfortably for your experience. I’d say no less than 65%…even for this recipe I often add a bit more water (but that depends on the flour).

3)If you like the above mentioned texture and look, do not  use a rolling pin to stretch out the dough. You will get rid of all the work from the yeast by forcing all the gas out and get flat “sides” (unless that is what you are looking for, that is). You do not need to know how to flip the dough in the air or any fine moves, just generously dust both sides with flour to avoid stick and lift the disc of dough (after lightly flattening the center of the ball of dough) with both your knuckes and let the own weight of the dough do the rest. It does take a bit of practice…but who cares if it is not perfectly round, I find it tastes soo much better!;)

4)for a darn good crust a high oven temperature is key (most pizza ovens are about 400ºC) so get your oven as high as possible, so the dough puffs up and charrs on the surface as quickly as possible without drying out! Check out Jeff Varasano’s site for some excellent info and watch the Heston Blumenthal video that follows for the cast iron pan trick that really works (he is not an experience pizzaiolo for all those who might have criticised him, but the point is that the trick to get as close to that temperature without playing with your oven pirolysis system does work! I used this until I got a decent stone to retain good heat). Here’s the youtube link in case you experience any problems or want to watch the other 2 that precede.

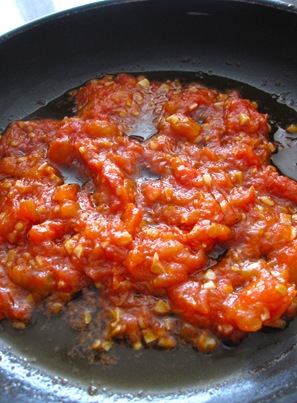
Anyway, as for the toppings go, I use my favourite quick tomato confit sauce, similar to the one I used here either peeling and deseeding or not the tomatoes (depends on how much time I’ve got :) either is good! I often prefer to peel by blanching and not bother deseeding because the skin dries up a bit and is more noticeable, but if not, you can leave as it is or pass through a food mill.

So, slowly fry the chopped up garlic cloves (or leave whole, just lightly crushed to release their flavour if you cannot bother with chopping) just make sure the heat is low so they release their flavour but don’t colour. Then, add the chopped up tomato, raise the heat, cover so that the tomato flesh softens quickly, then, remove the cover to evaporate until the oil begins to separate again!Tasty & quick!

IMG_6522

Time to get your pizzas ready for the oven, full blast (mine goes up to 275ºC (or so it says in the thermostat! but if I can get it to 250ºC I’m happy) I just preheat the stone and place it on the top third so it is closer to the grill.

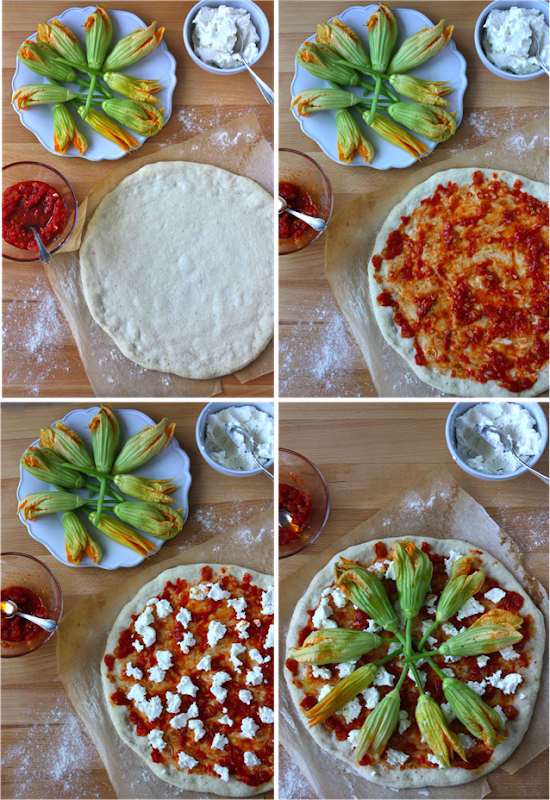
For the squash blossom one, once the dough is stretched cover lightly the bottom with the cooled tomato sauce, distributing it so it is a thin layer and leaving 2cm off the edges clean so the cornicione raises properly. Scatter knobs of ricotta here and there, place the thoroughly washed blossoms over in a pattern you like or just not arranged and season with some salt, pepper and a light drizzle of olive oil. Also,if you like some finely grated lemon rind and some shaved parmesan.

pizza blossom

In it goes while we prepare the next one!

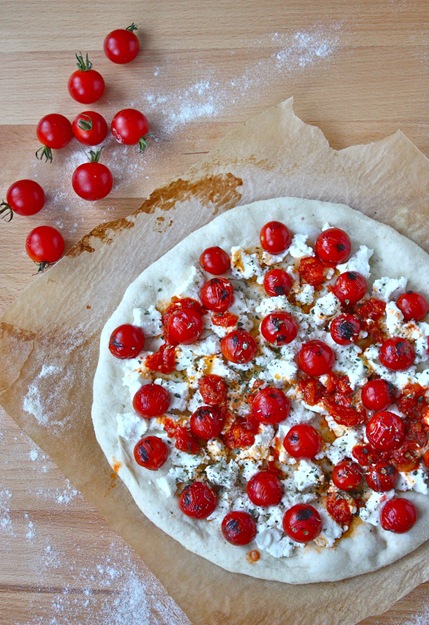
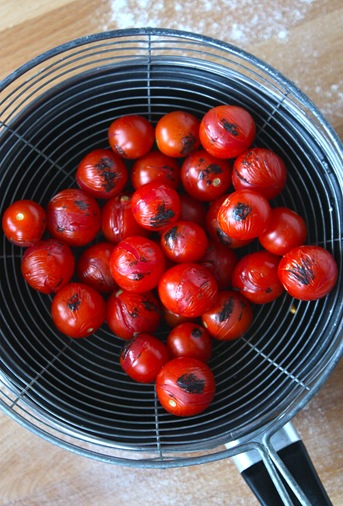
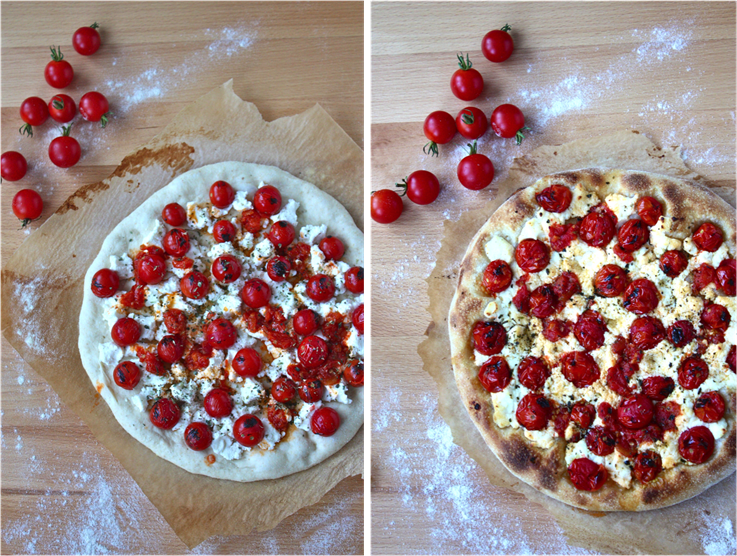
Cover the bottom with ricotta, also a light hand. Then, charr your tomatoes using a torch! An excellent idea I learnt the blog Ideas in Food and used to get that charr flavour and look in this pizza that won’t be enough time in the over to give that colour!

IMG_0658

I was amazed with the results! The tomatoes get a bbq flavour but become soft and this brings out their sweetness (Ok, these were good tomatoes) but the flavour and texture this charring exposed is beautiful!

Since I was left with some tomato sauce, I scattered that bit around and then the tomatoes. Finally I seasoned with the pepper and oregano (some fresh herbs would be nicer!but didn’t have any at the time!) a drizzle of oil and ready for the next batch after the first one came out!

IMG_0660

In and out it goes!

pizza burnt cherries

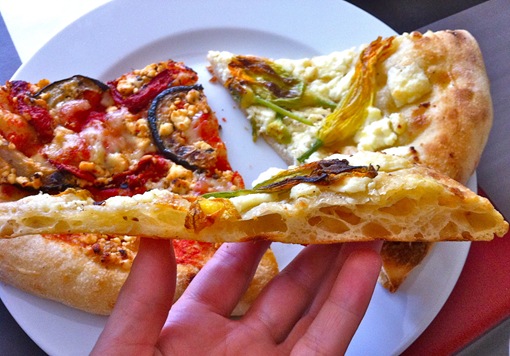
I didn’t get to take a photo of the crumb, but here’s one of the previous batch. I’ve been needing a lot of comfort food!:)

IMG_0649

continue for recipe...